DIY Doily Dress Tutorial
This sweet little doily dress is quick, easy, and so pretty! Perfect for card making, journals, or embellishing a gift bag. I used a 6" and 8" white doily for mine, but can you imagine how stunning it would look in gold?

Instructions:
Step 1: Create the Skirt
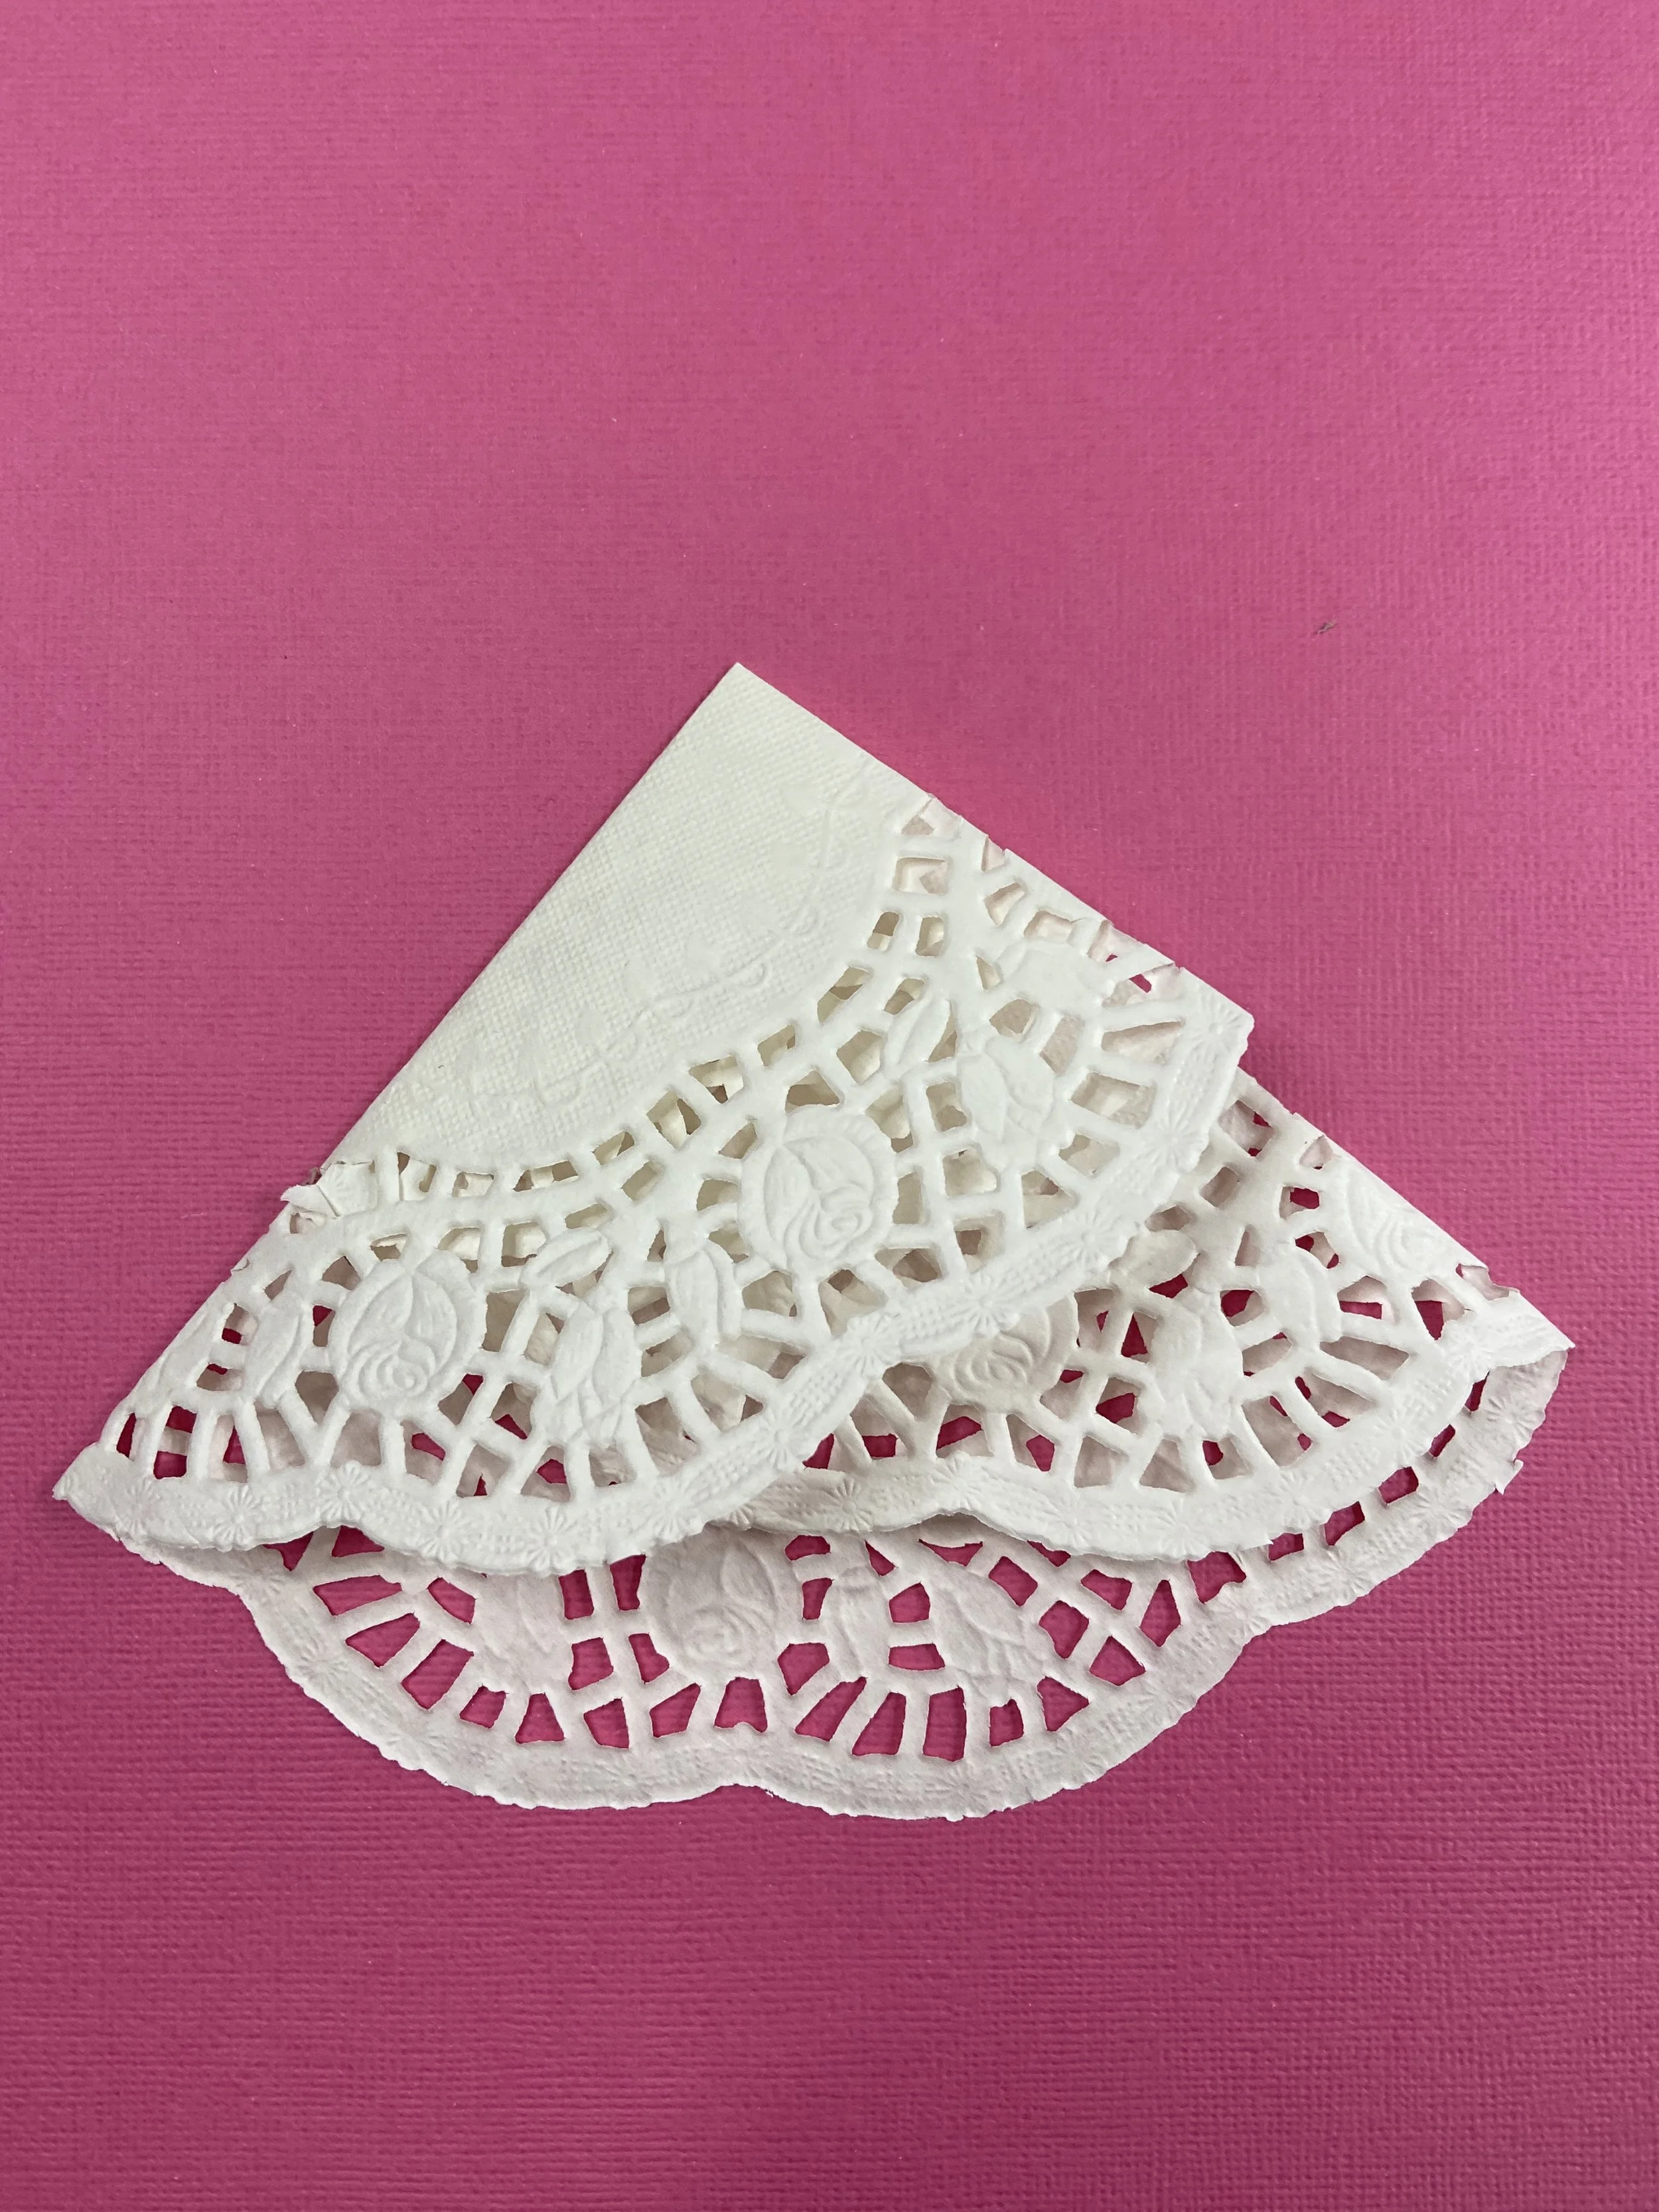
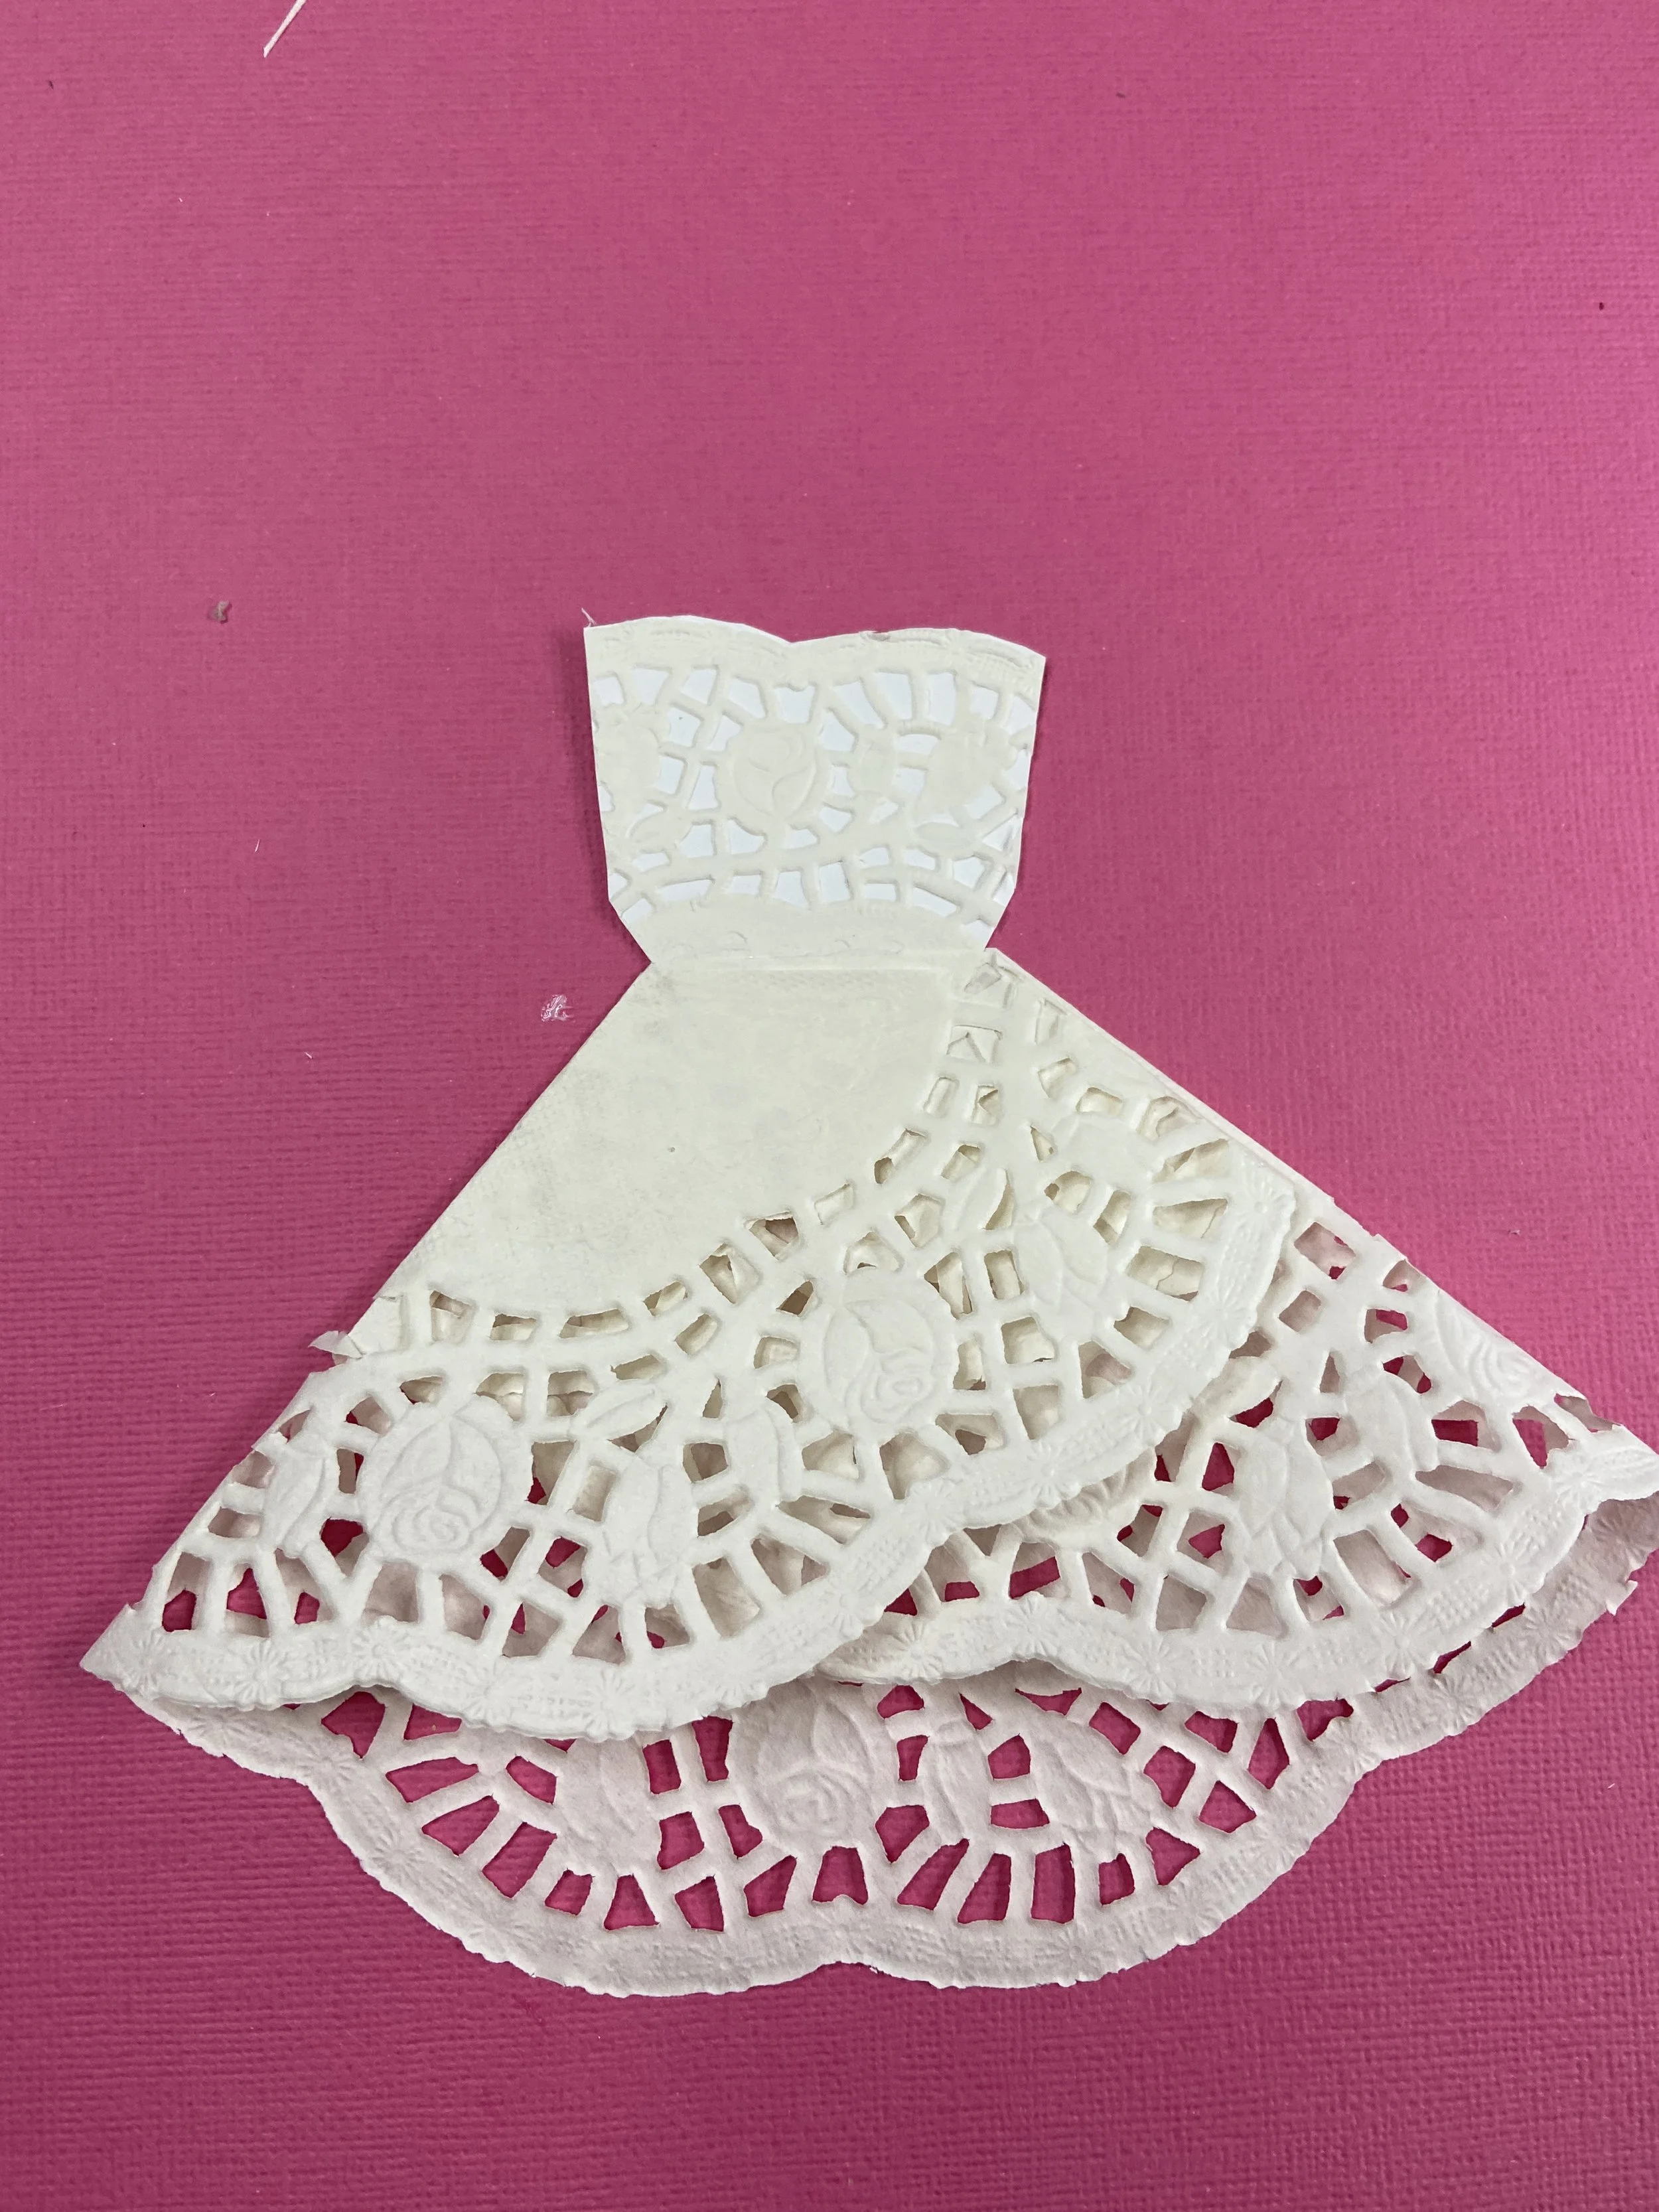
Take your 8" doily and fold about 2/3" down from the top—this lets the pretty edge of the doily show.
Fold each side inward so the lacy edge meets the solid center part. This creates the flowing skirt shape.
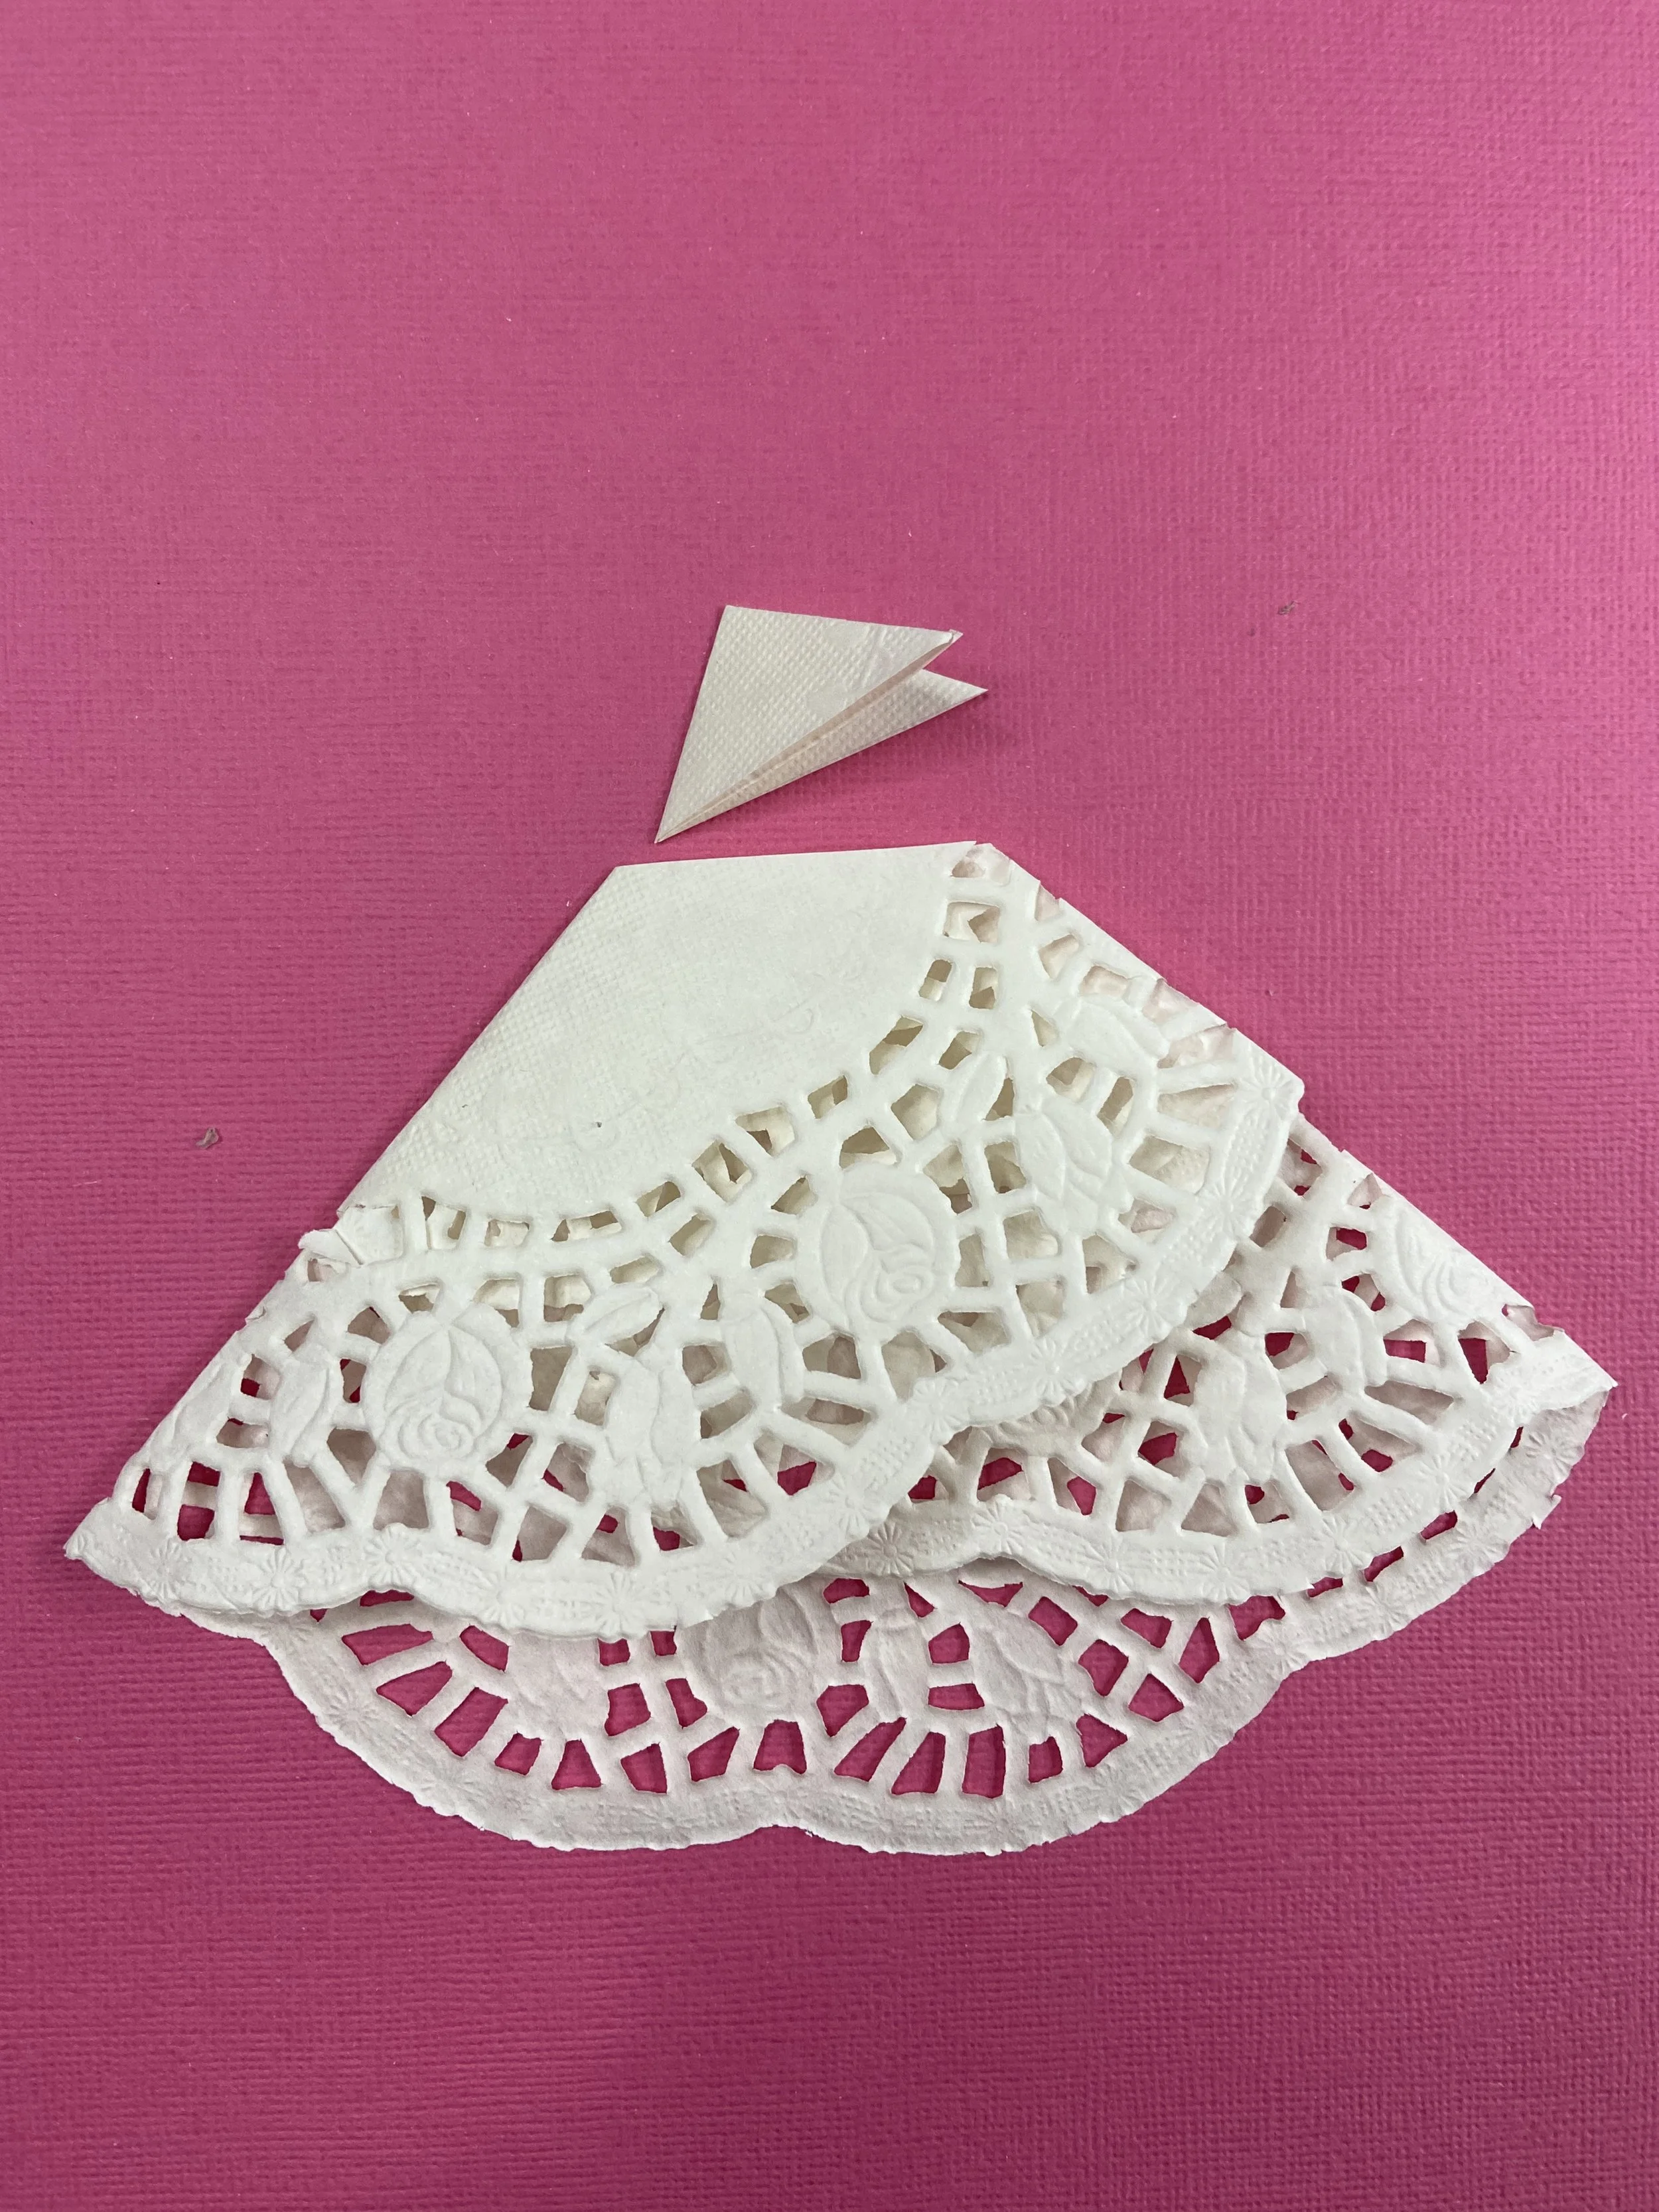
Cut off the small triangular top portion—this will become the waistline of your skirt.

Step 2: Make the Bodice
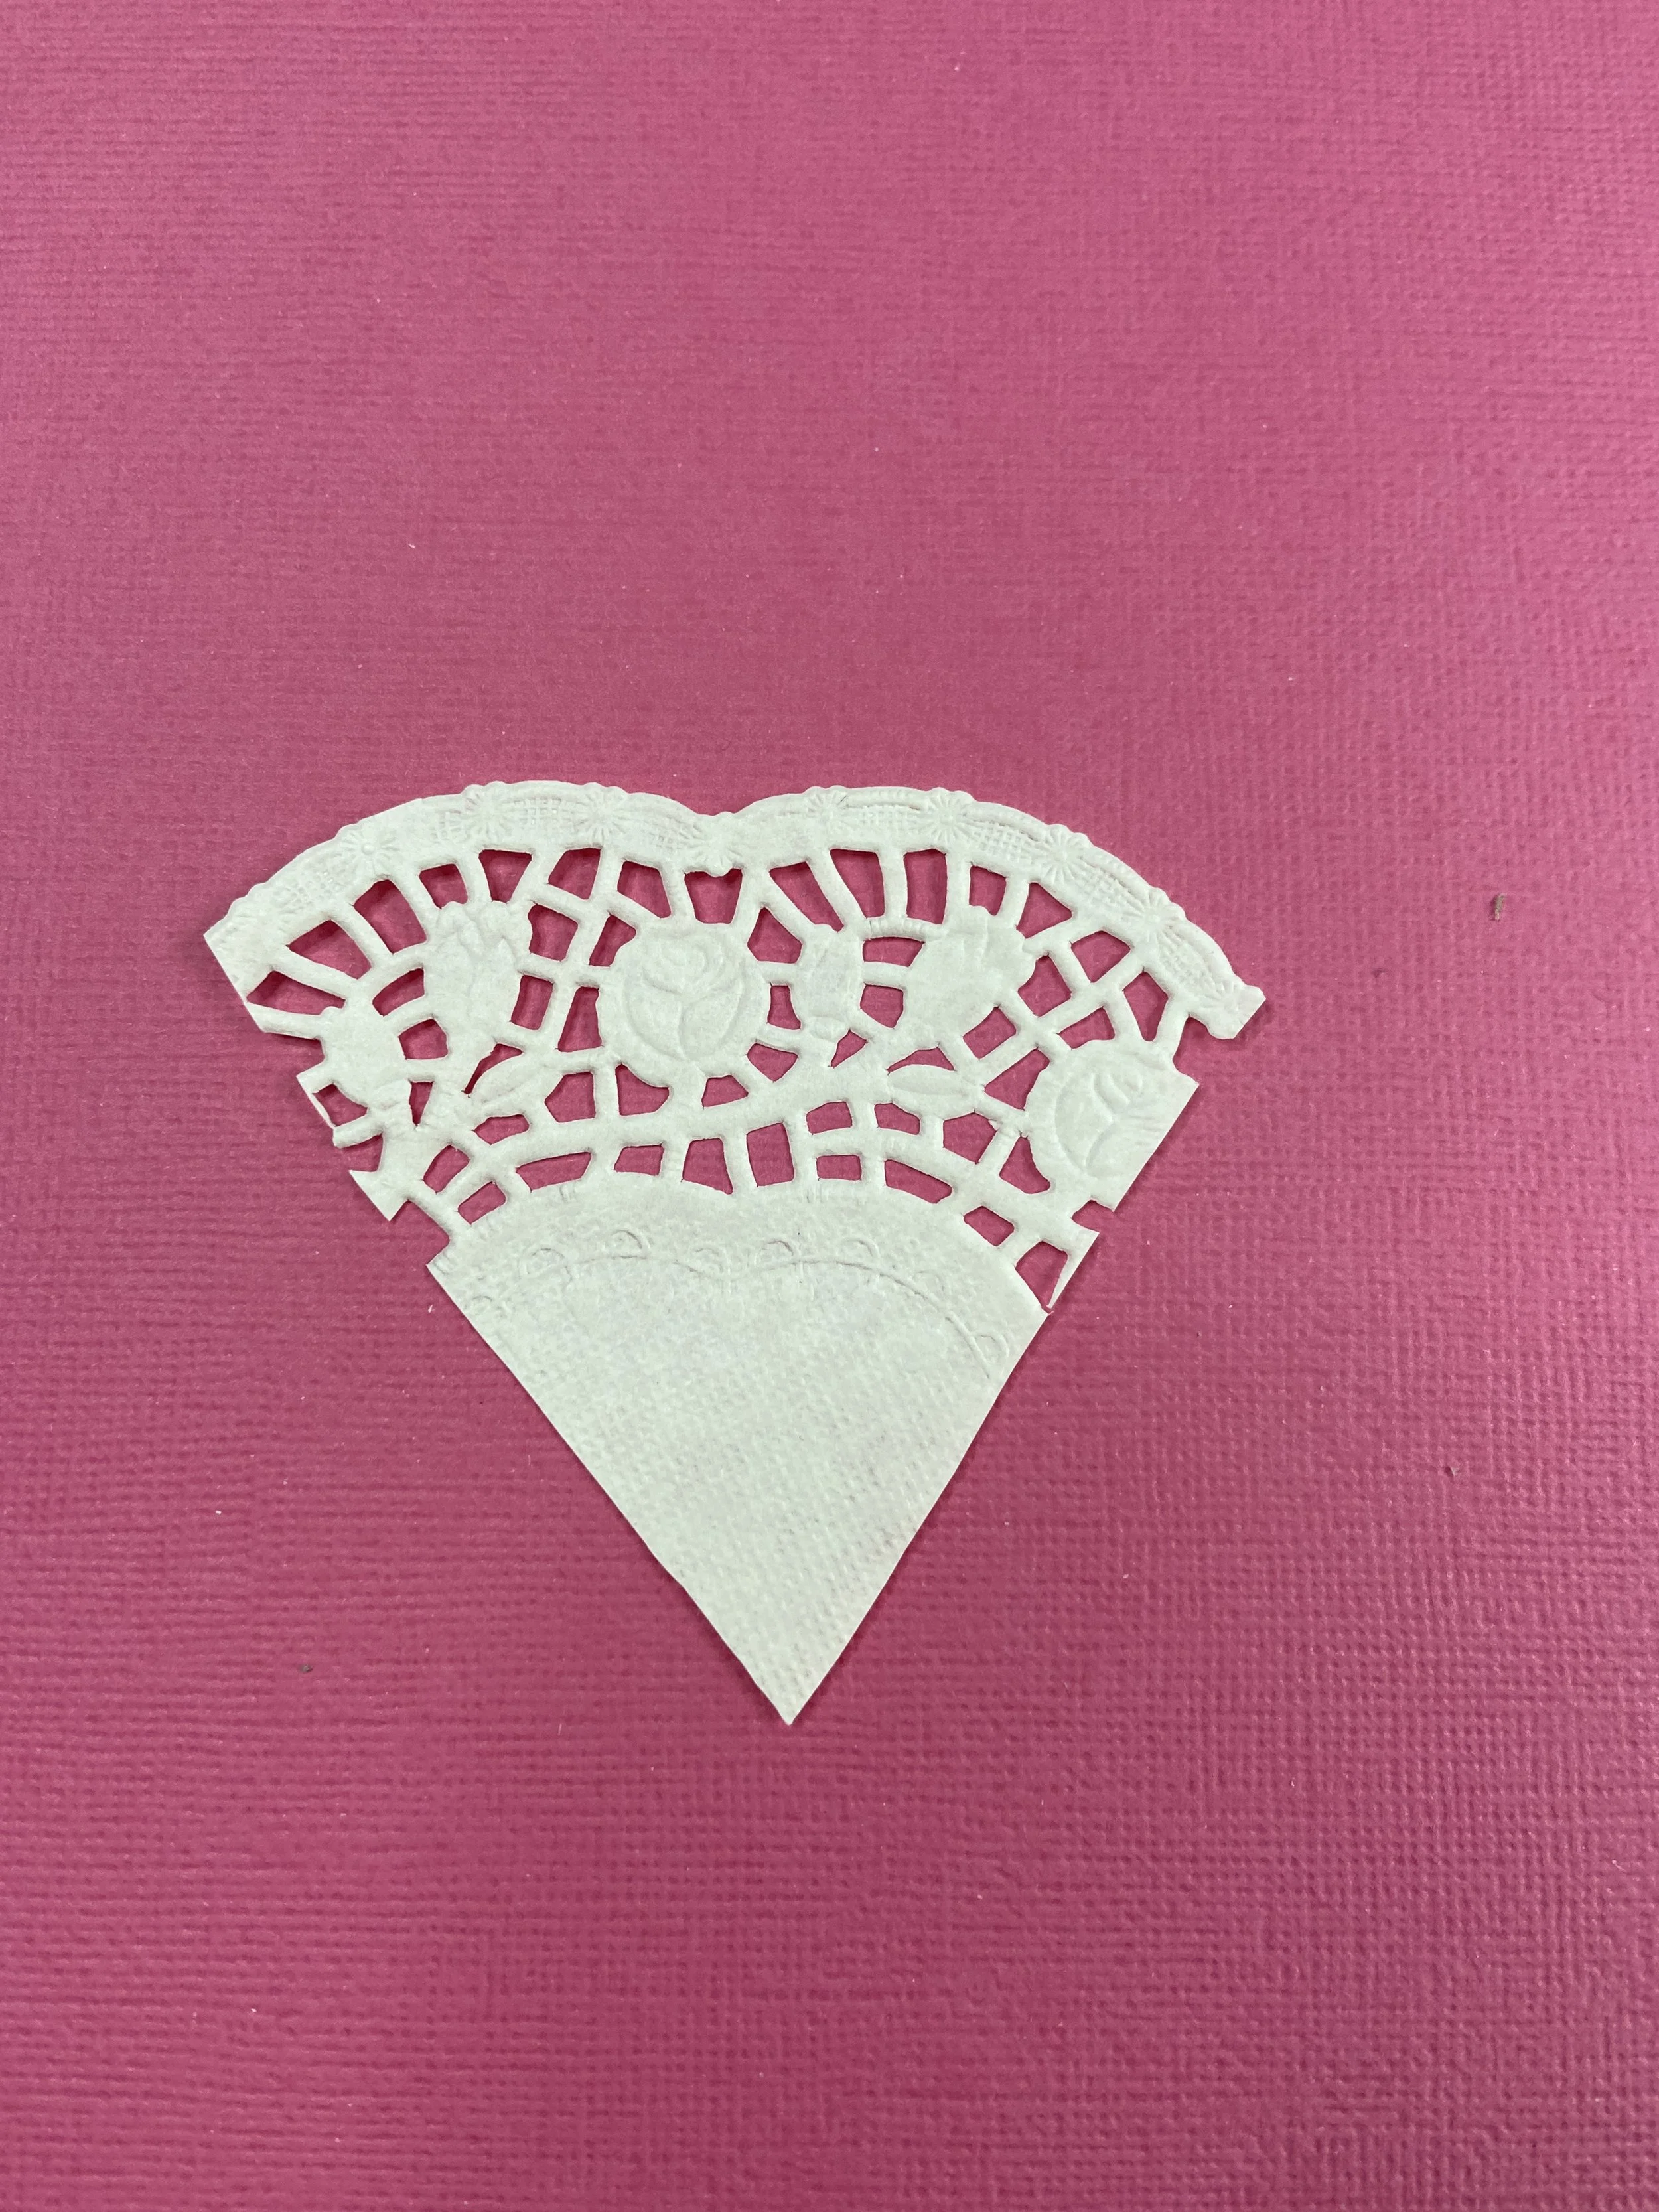
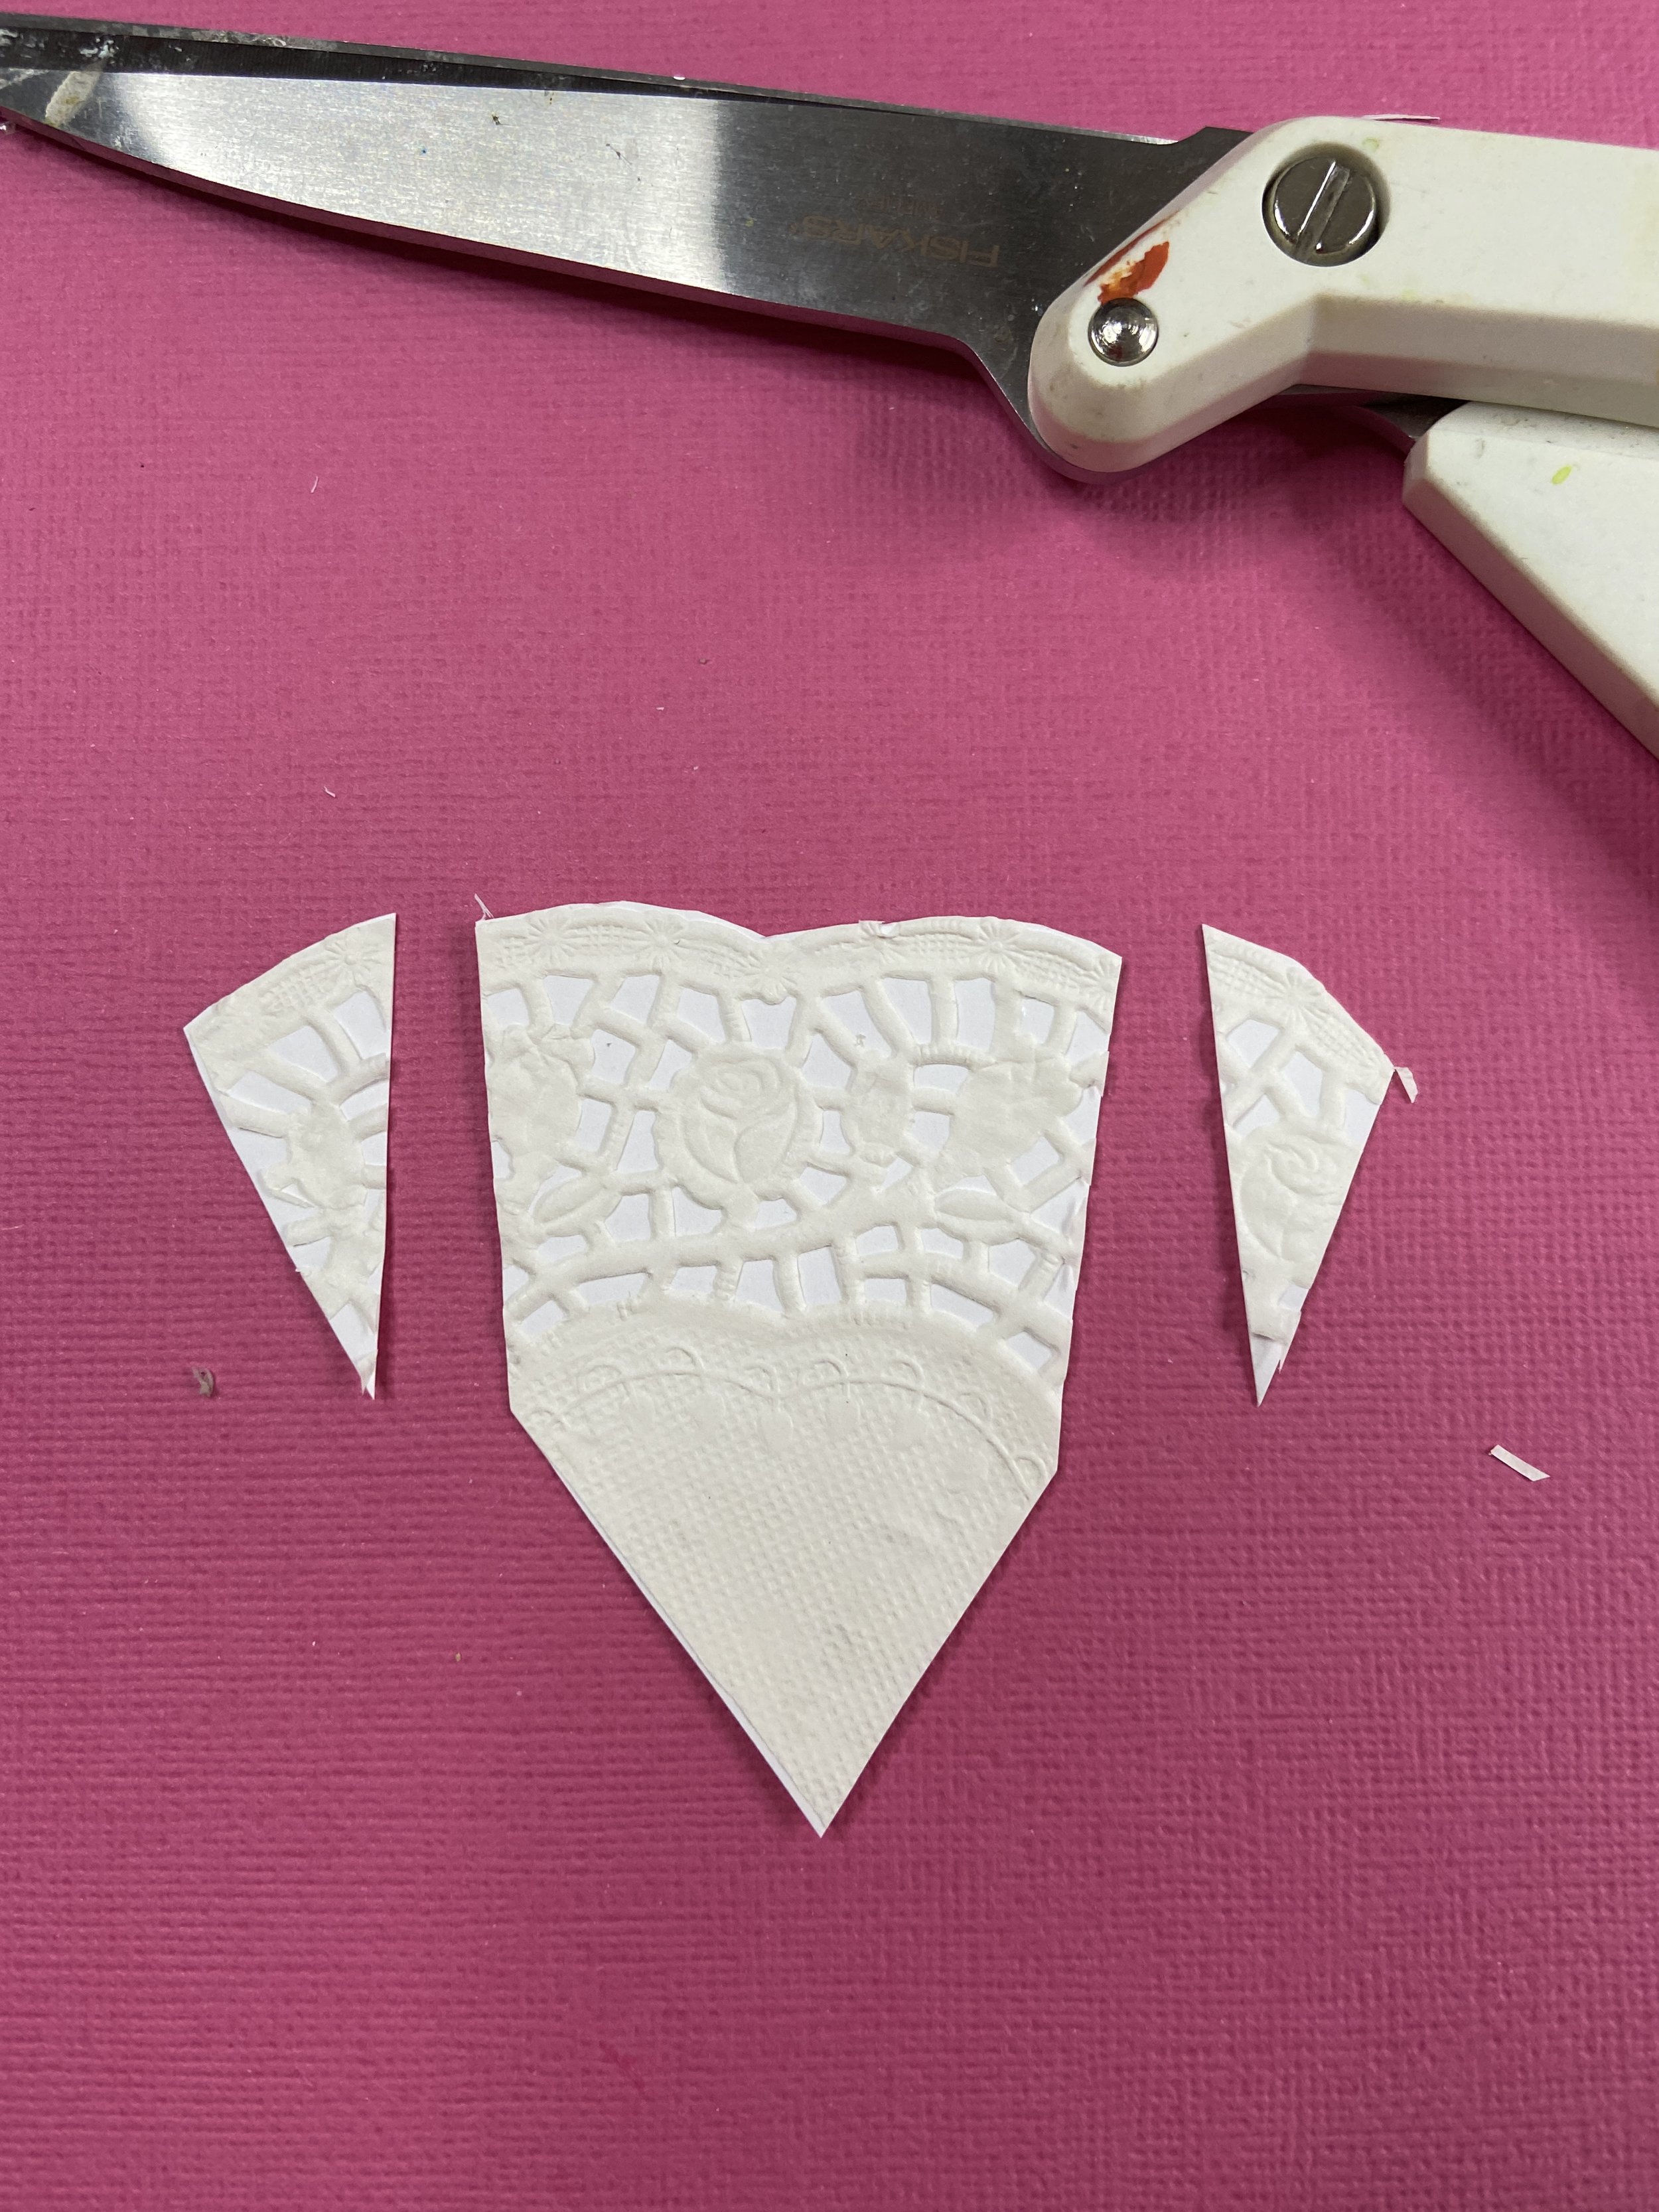
From the 6" doily, cut out a heart shape (this will form the top of the dress).
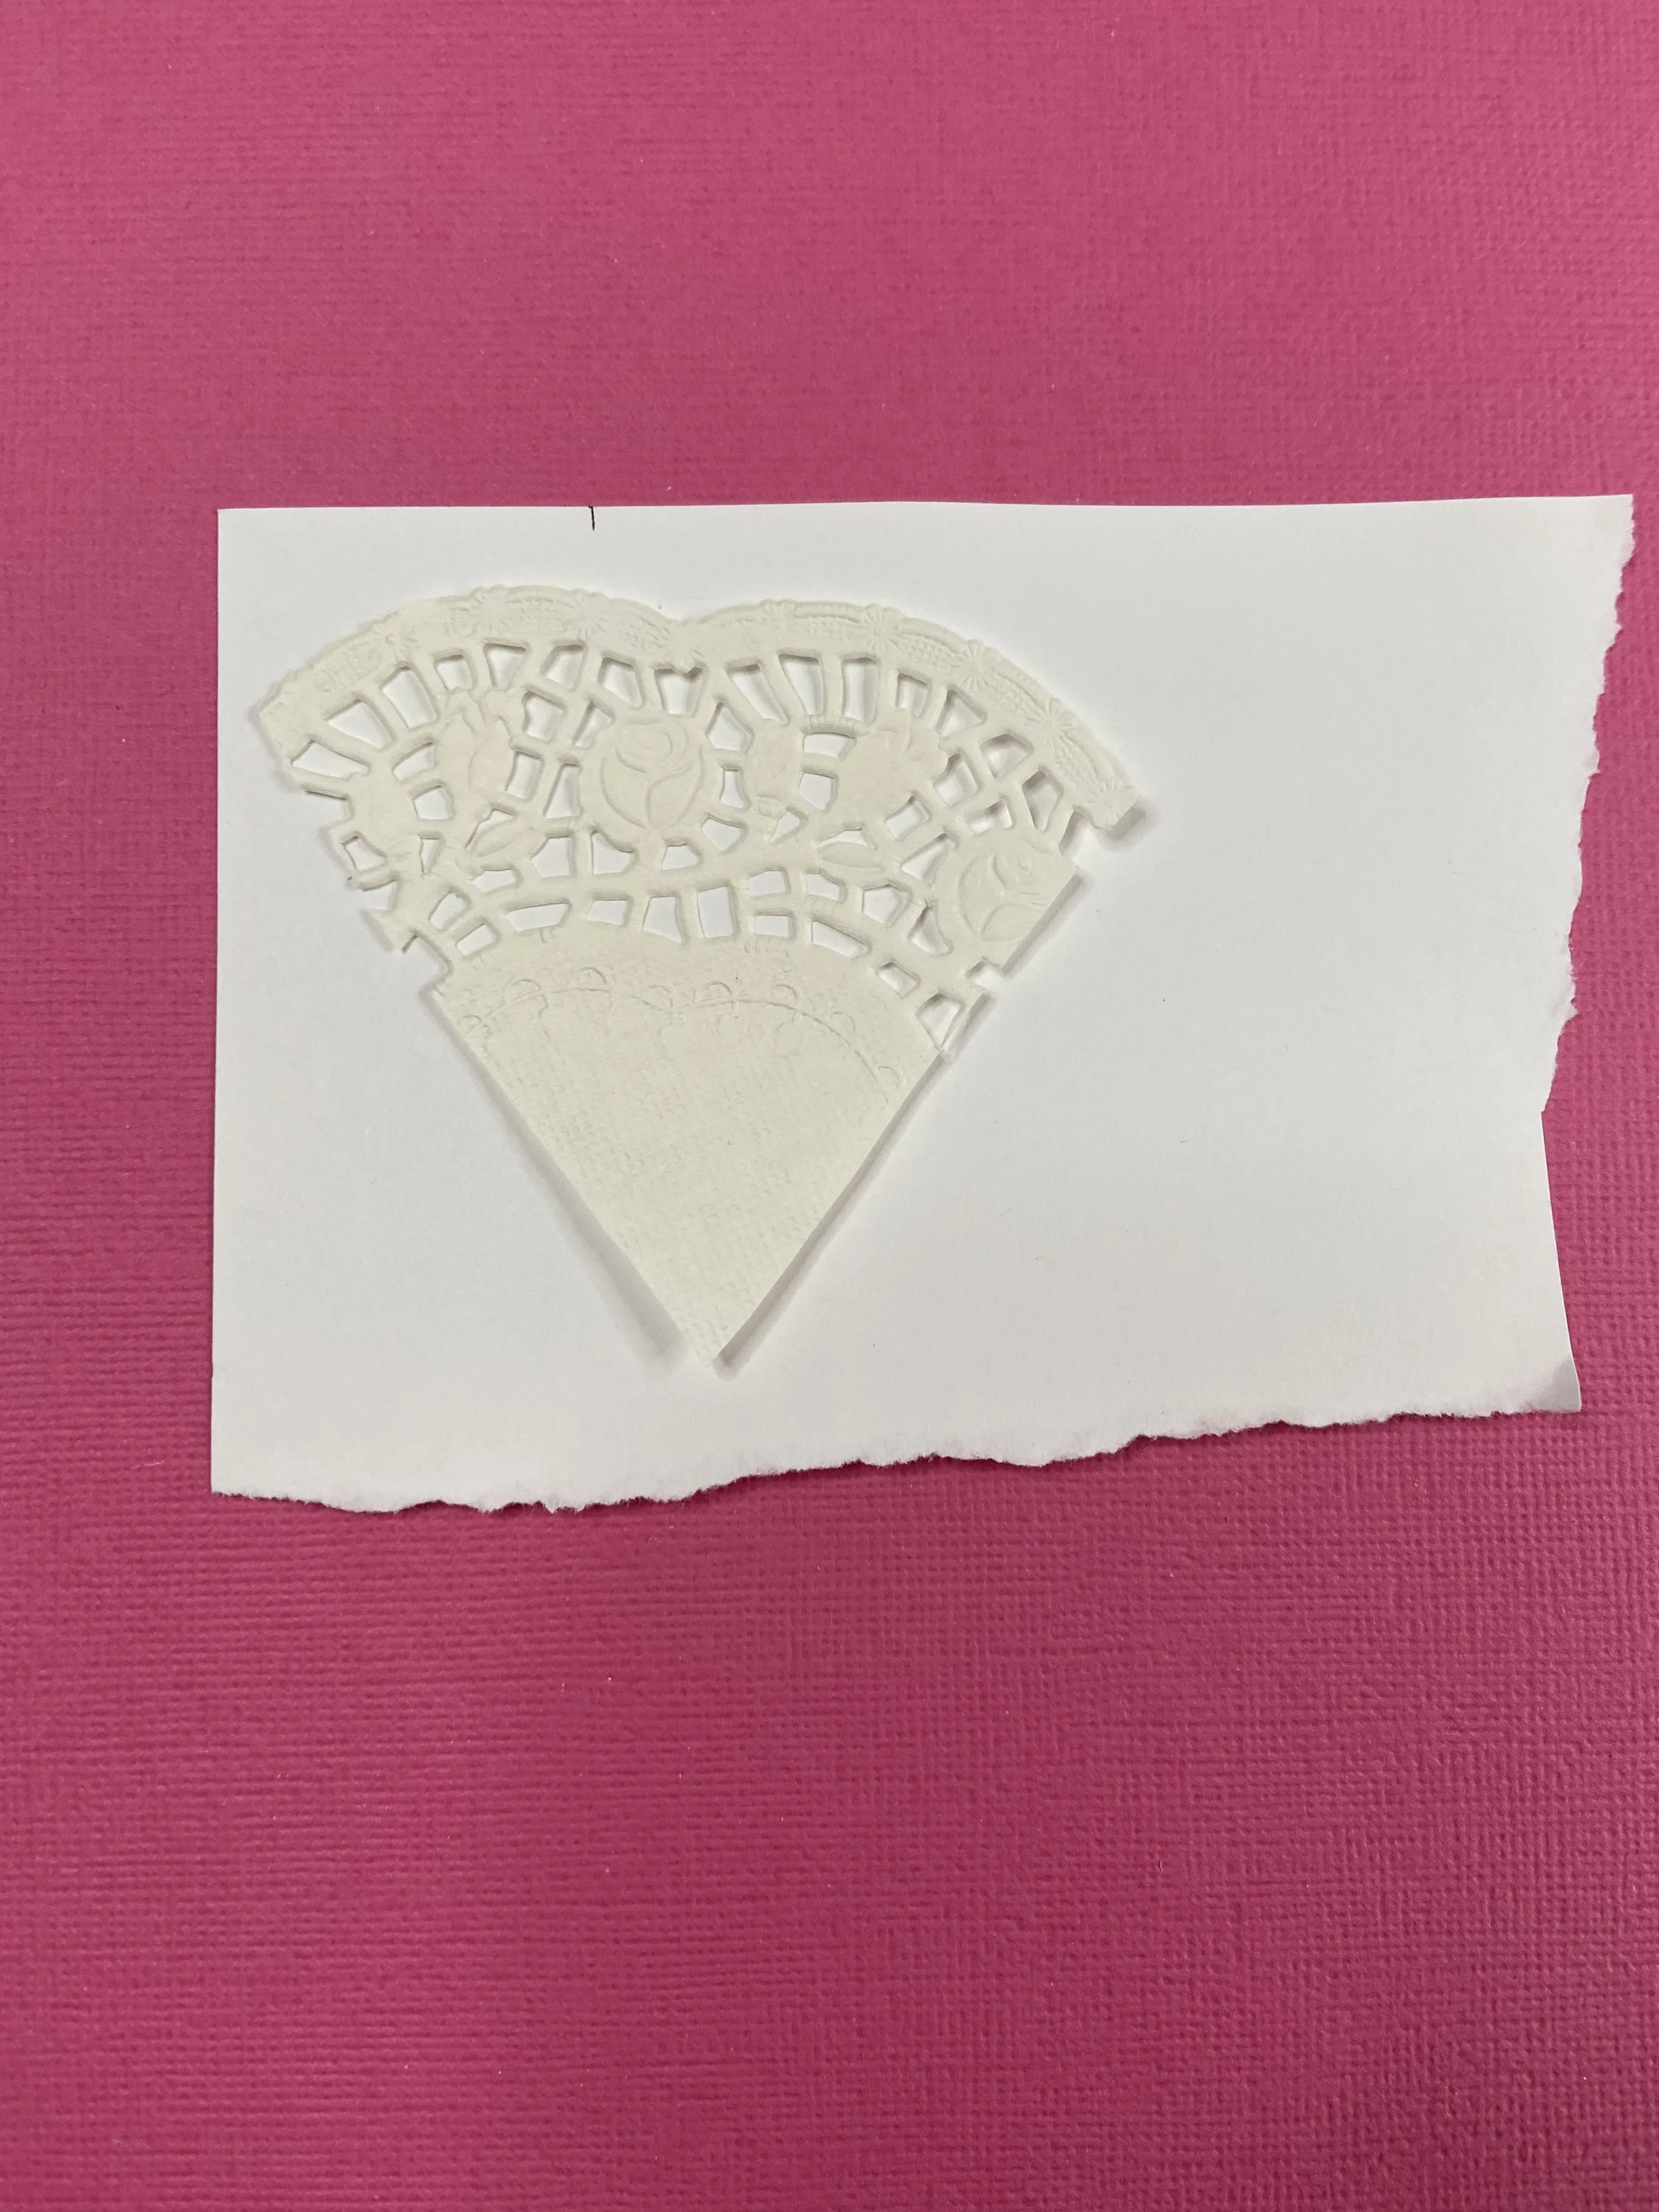
Glue the heart onto a piece of cardstock for sturdiness, then trim away the excess paper.
On each side of the heart, cut a tiny section off to give it more of a “bodice” shape.
Trim as needed so it will fit neatly inside the top of your folded skirt.


Step 3: Put It All Together
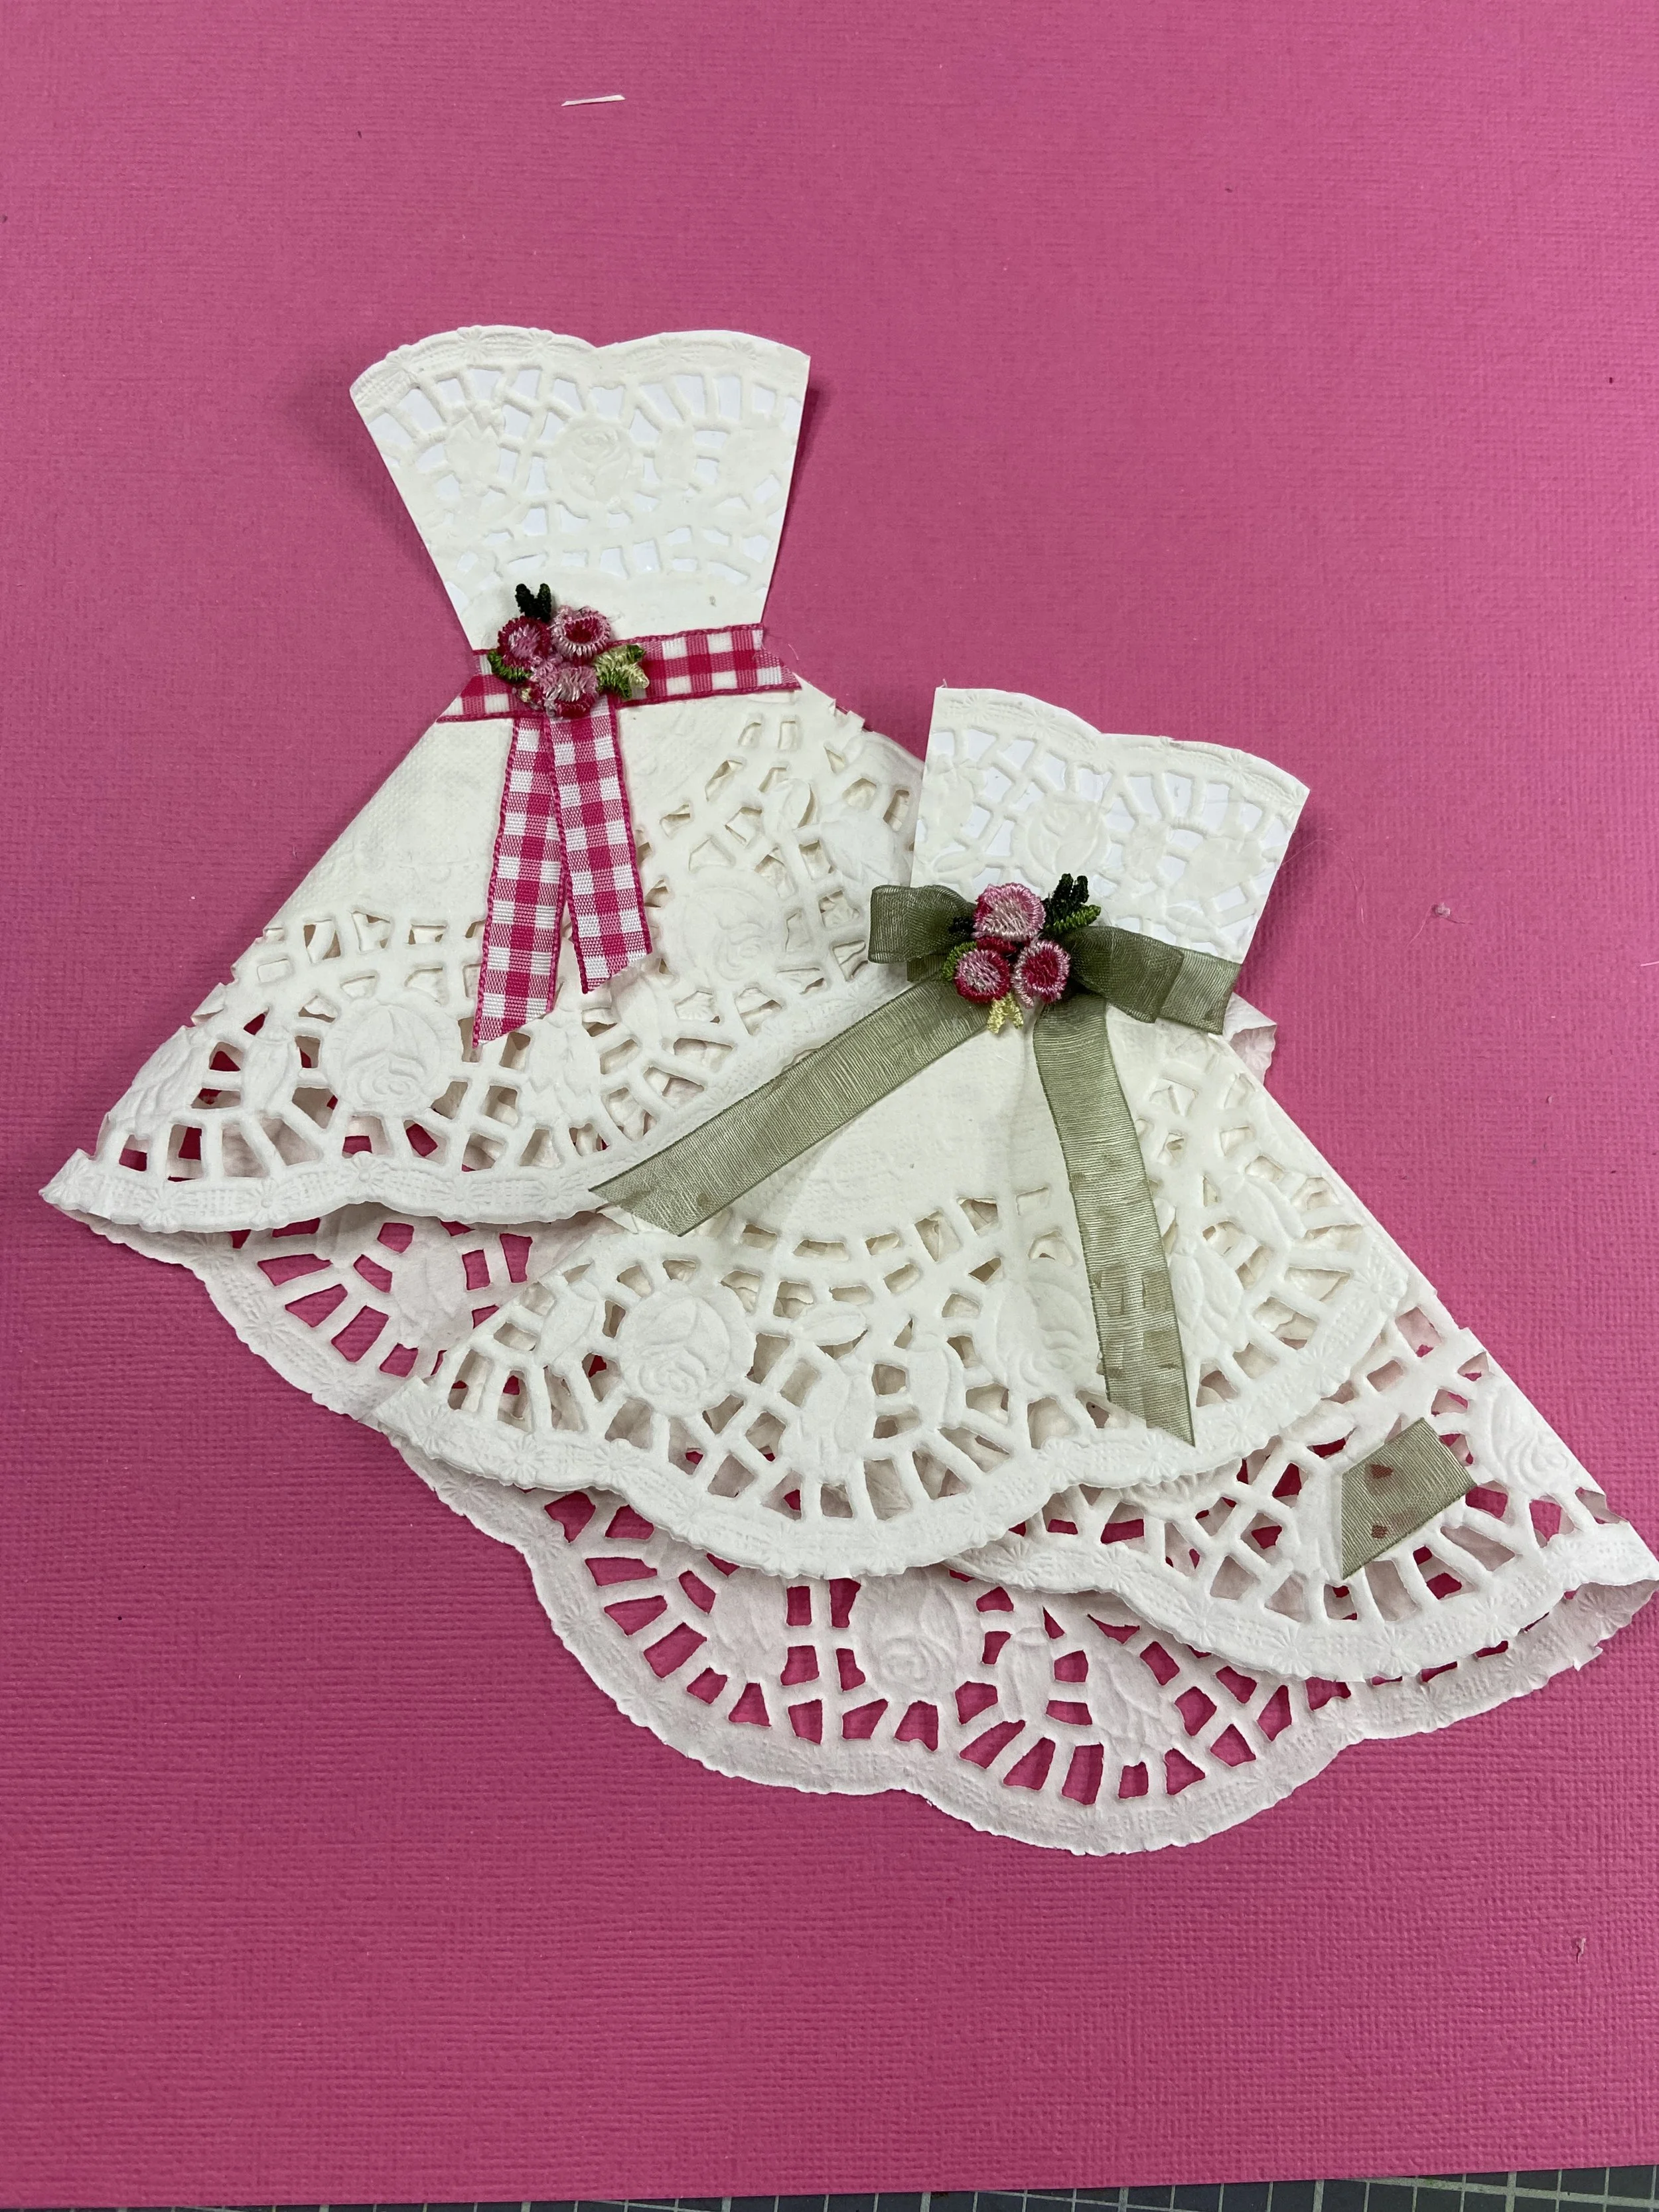
Glue the bodice (heart) onto the skirt at the waistline.
Add a ribbon around the waist and secure it with your chosen embellishment (flower, button, or rhinestone).
For extra sparkle, you can also add rhinestones to the bodice of the dress.


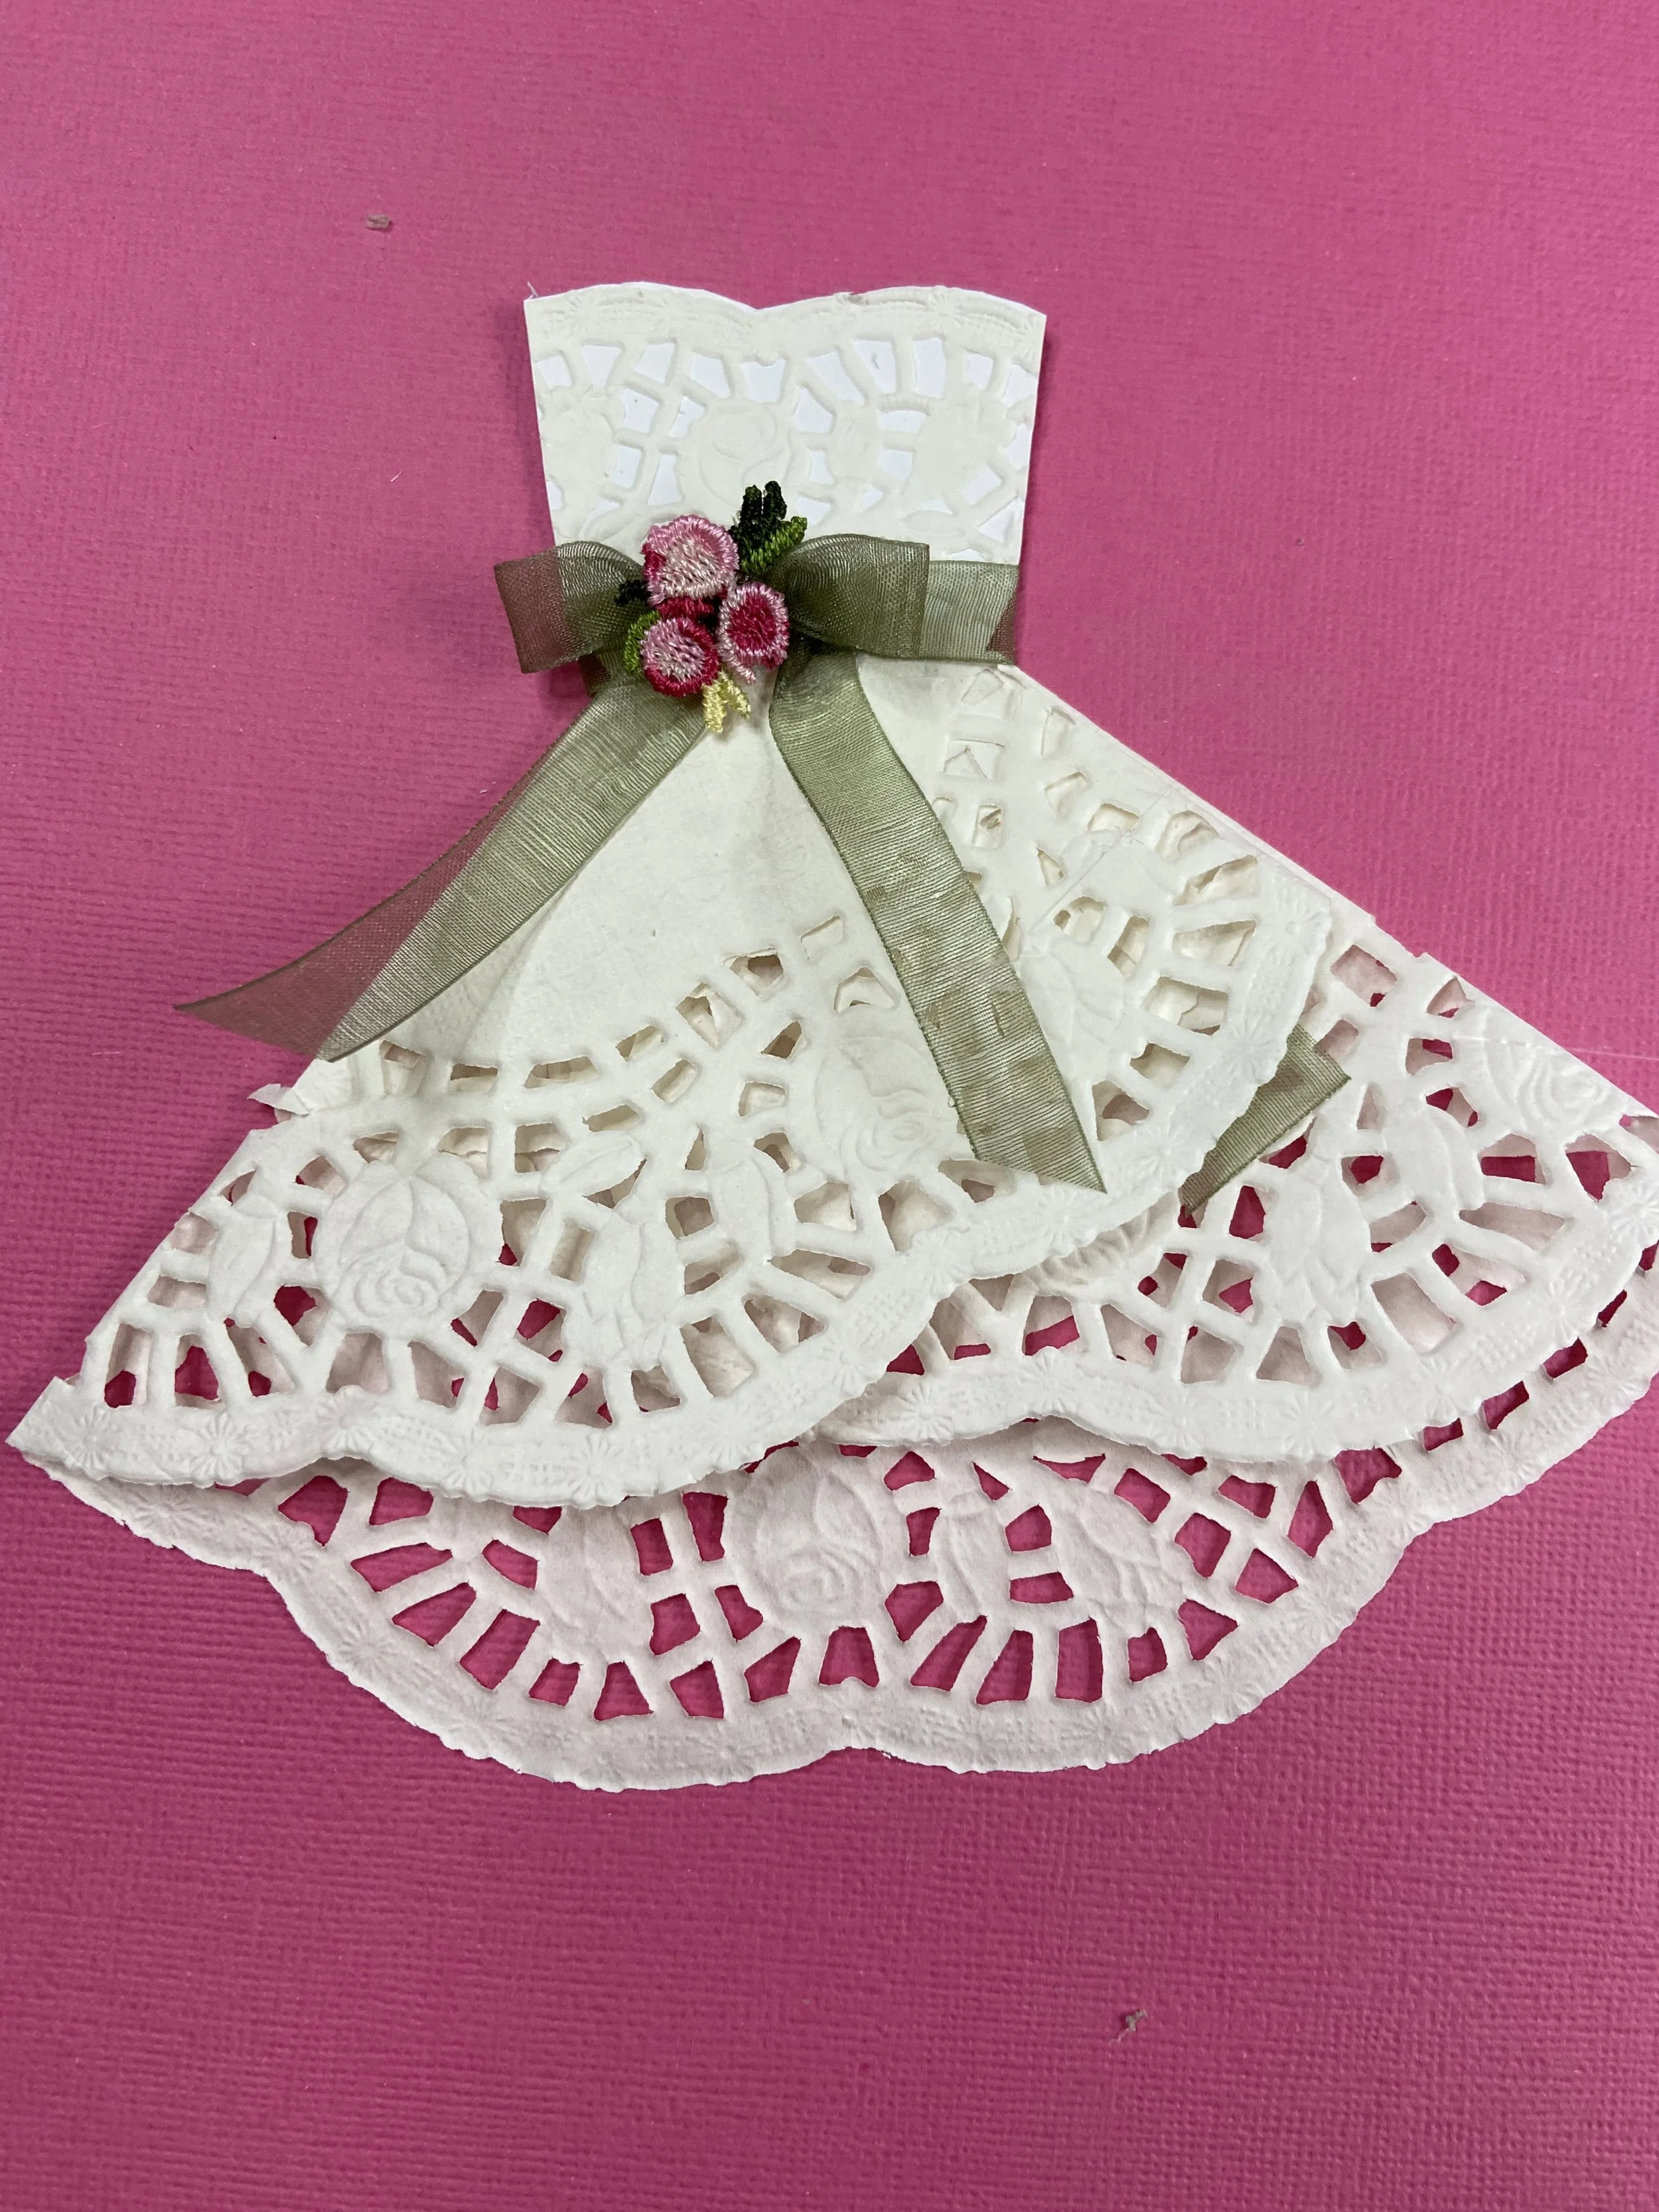
Finishing Touches
And that’s it! You now have a delicate doily dress that you can use on cards, in your journals, or as a sweet embellishment for your next craft project. The lace detail from the doilies makes it look elegant, and you can switch up the colors, ribbon, and embellishments to match any theme.