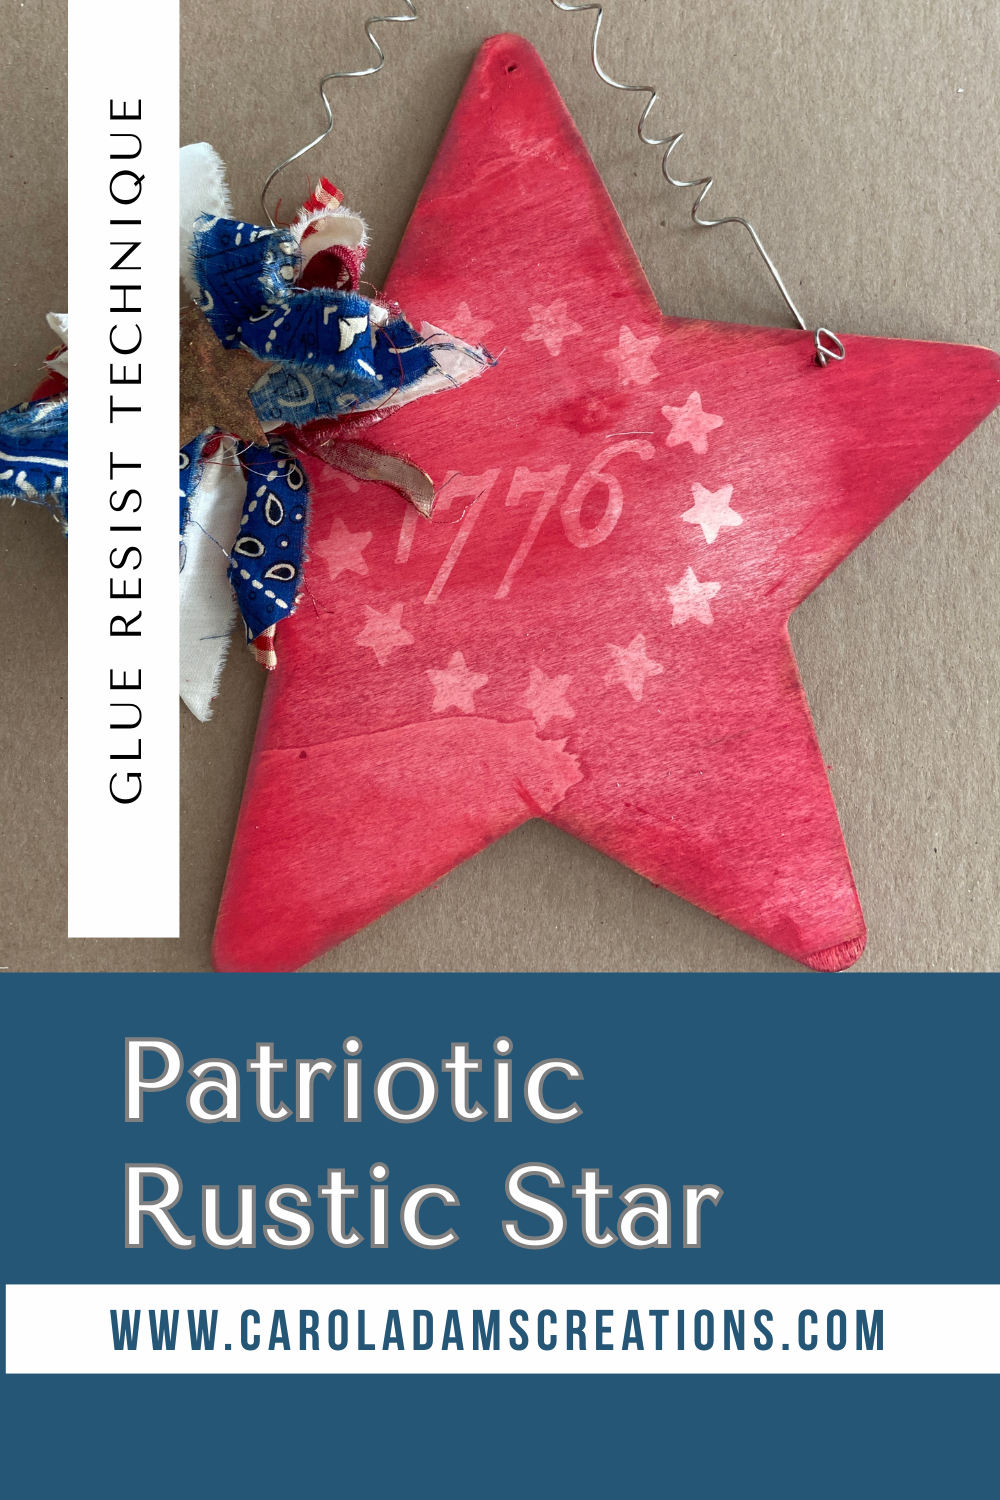
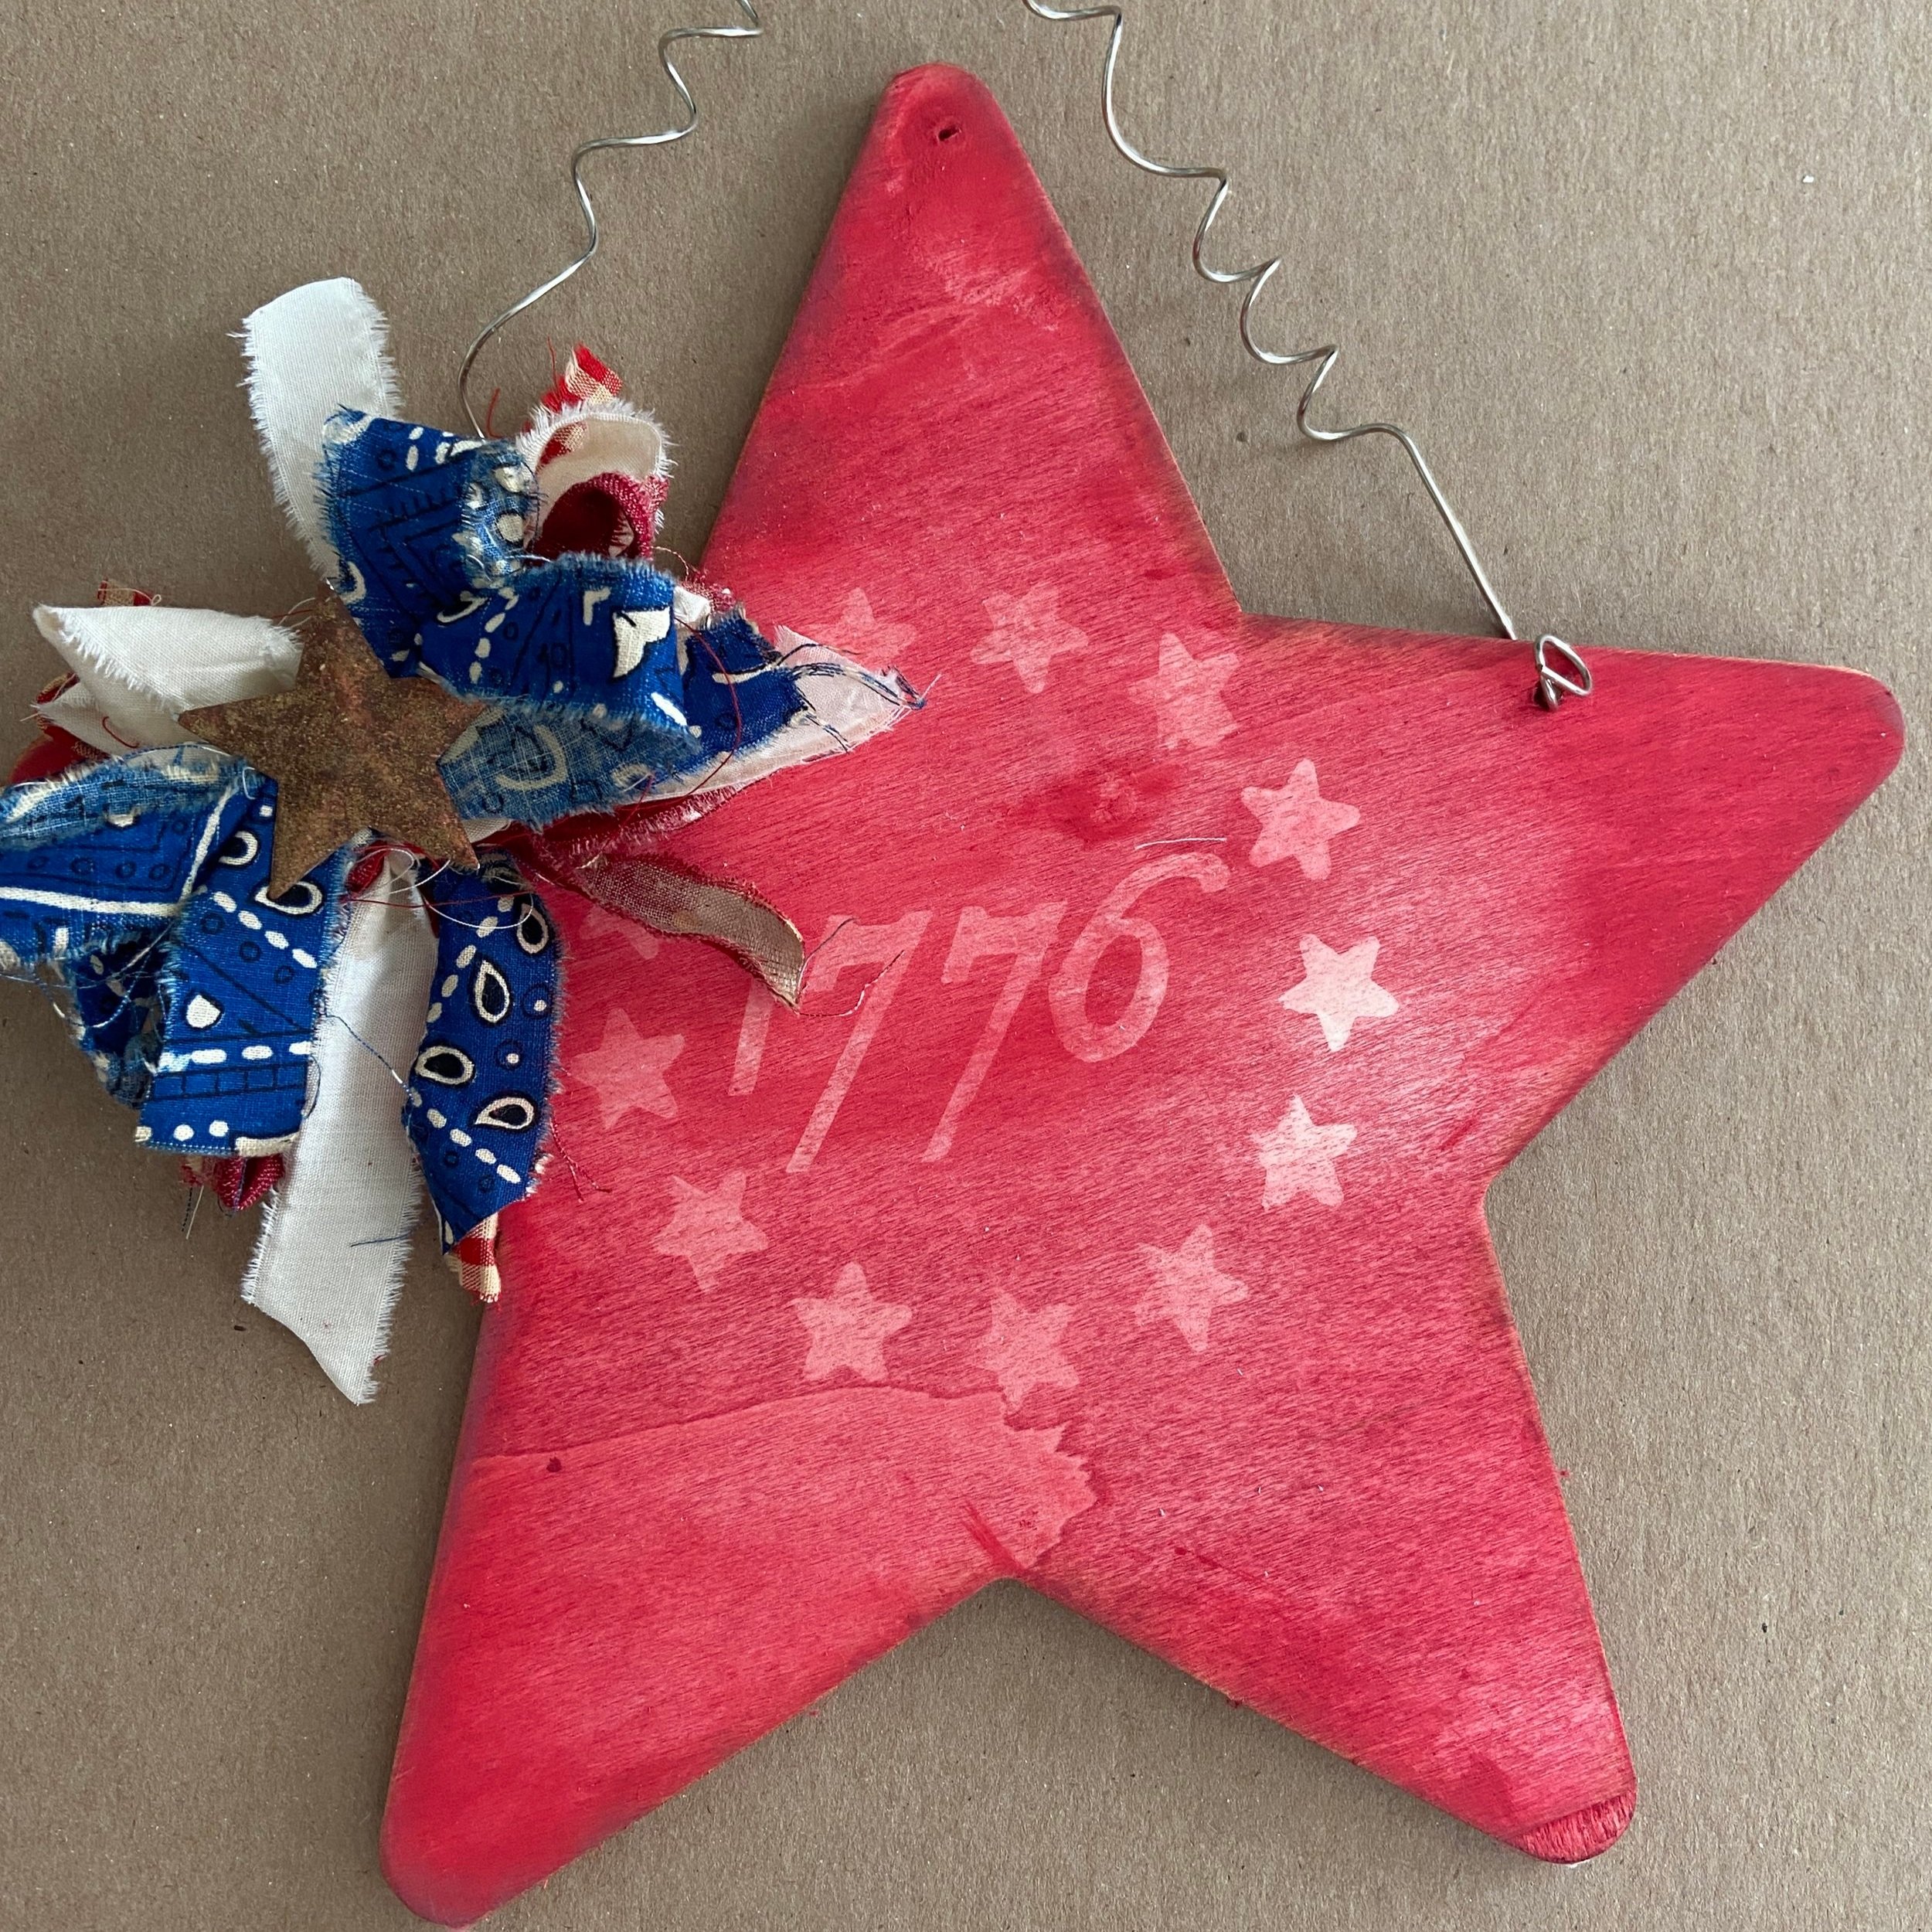
Patriotic Rustic Star with a Glue Resist Technique
I have to admit—this clever glue resist technique isn’t something I came up with myself. I was inspired by a fabulous project shared on Pickitz Crafts over on Facebook. She has some amazing tutorials, and I definitely recommend checking her out!
But once I saw it, I knew I had to try it with my own rustic, patriotic twist. This star turned out so charming—and it’s perfect for summer, Fourth of July, or anyone who loves Americana-style décor.
✂️ Supplies You’ll Need:
Wooden star shape (I found mine at Walmart)
Elmer's Glue or any craft glue
Waverly Chalk Paint in Red and Antique
Brown and Copper acrylic paint
Ground cinnamon (yes, the kind from your spice rack!)
Sponge dauber
Baby wipes or paper towel
Sandpaper (optional for rustic effect)
Ribbon, buttons, or embellishments (go wild!)
Wire for hanger
This page contains affiliate links. If you choose to purchase after clicking a link, I may receive a small commission at no extra cost to you. Thank you for supporting my creative journey!
🎨 Step-by-Step Instructions:
Step 1: Create the Glue Resist Design
Start by applying Elmer’s Glue through your stencil using a sponge dauber. I created my own stencil in Cricut Design Space and cut it from cardstock. To help the stencil stay in place, I used Pixie Spray Adhesive (trust me—it’s a game changer!).
Let the glue dry completely before moving on.

Step 2: Add Paint and Reveal the Magic
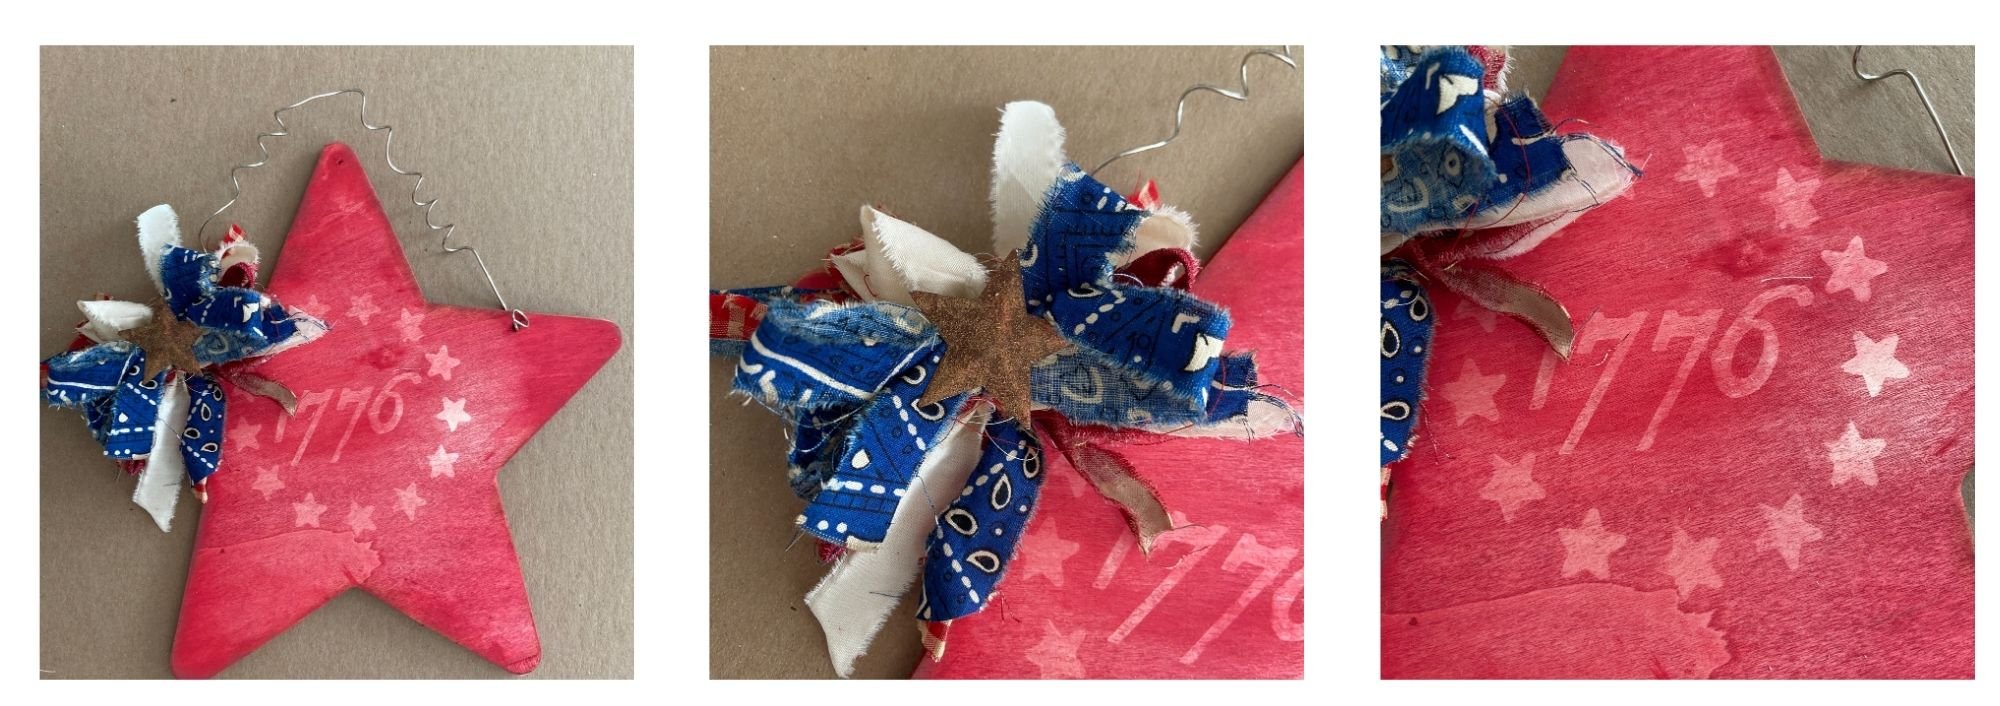
Once the glue is dry, it’s time for the fun part! Using a paintbrush, baby wipe, or paper towel, apply chalk paint over the entire star. Then gently wipe or dab to lift the paint from the glue resist area, revealing your design.
Step 3: Distress the Edges
After your star is completely dry, use sandpaper to lightly rough up the edges for that weathered, rustic look. I also added a bit of Gathered Twigs Distress Ink around the edges to deepen the aged effect.
Step 4: Coffee-Dye Your Fabric Strips
I wanted to use fabric for my bow, but nothing I had looked quite rustic enough. So, I tore strips of red polka dot, red gingham, blue bandana, and muslin fabric, then soaked them in instant coffee for 5–10 minutes (longer = darker). Let them dry completely before making your bow.

Step 5: Create a "Rusty" Metal Star
To make the center embellishment for your bow, paint a metal star with 2–3 coats of brown acrylic paint. While the final coat is still wet, dab on a little copper paint and sprinkle with cinnamon for a perfectly rusty finish. It smells amazing too!
Step 6: Add a Wire Hanger (Optional)
If you’d like to swap out the twine hanger for something more farmhouse-style, drill two small holes in the top of the star and insert heavy craft wire. The Walmart stars come with jute, but I loved the look of the wire.
Step 7: Assemble the Bow and Finish
Using a bow maker (or just your hands), create a layered bow from your dried coffee-stained fabric strips. Secure it with hot glue and attach it to your star. Finish by gluing the cinnamon “rusty” star in the center.
Display your Patriotic Rustic Star proudly next to a tiered tray, on a shelf, or as part of your summer home décor. It's sure to bring a spark of handmade charm wherever it hangs! I can’t wait to try this glue resist technique on other projects! So much fun!